When polled, easily our most favoured method of deploying MariaDB Galera Clusters happens to be the on-premise option, when our customers and users use Galera Manager.
So to start, we will deploy 3 hosts, running Ubuntu 22.04 LTS. These are just deployed with the base operating system (OS). You are advised to read the supported OS matrix which can change as releases abound. You will need a fourth pristine host to run Galera Manager (it can be a different OS, but for ease of installation and simplicity, we will keep it uniform). So with four provisioned hosts, you’re ready to get started with your Galera Manager + MariaDB Galera Cluster on-premise installation. Obtain Galera Manager by filling in the form.
Now you can login to the host that you’re installing Galera Manager on. Ensure that you are the root user.
Now grab the gm-installer either via scp or wget it to your host. The direct link is in the video or the documentation! It is time to make the installer executable, which you do by typing: chmod +x gm-installer. Verify the version:
./gm-installer version
gm-installer version 1.12.0 (linux/amd64)
To get started, simply execute:
./gm-installer install
Accept the license agreement, enter the admin password, enter the IP (this means that you will get an install over insecure HTTP) or hostname (this install thus executes over secure HTTPS), and you’re on your way to getting your Galera Manager host installed.
Typically this installation process takes less than 5 minutes, as it has to pull in packages from multiple repositories. Yes, it goes without saying, the current install method requires access to the Internet (we do not support an offline install mode). It is also important to ensure that if you have a firewall, to open up TCP ports 80, 8081. 443 will also apply if you’re using HTTPS. Once the installation is complete, you will see something similar to the following:
█INFO[0299] Galera Manager installation finished. Enter http://206.189.153.240 in a web browser to access. Please note, you chose to use an unencrypted http protocol, such connections are prone to several types of security issues. Always use only trusted networks when connecting to the service.
INFO[0299] Logs DB url: http://206.189.153.240:8081
IMPORTANT: ensure TCP ports 80, 8081 are open in firewall.
INFO[0299] Below you can see Logs DB credentials:
DB name: gmd
DB user: gmd
DB password: hOfuUXqZdQ
The installation log is located at /tmp/gm-installer.log
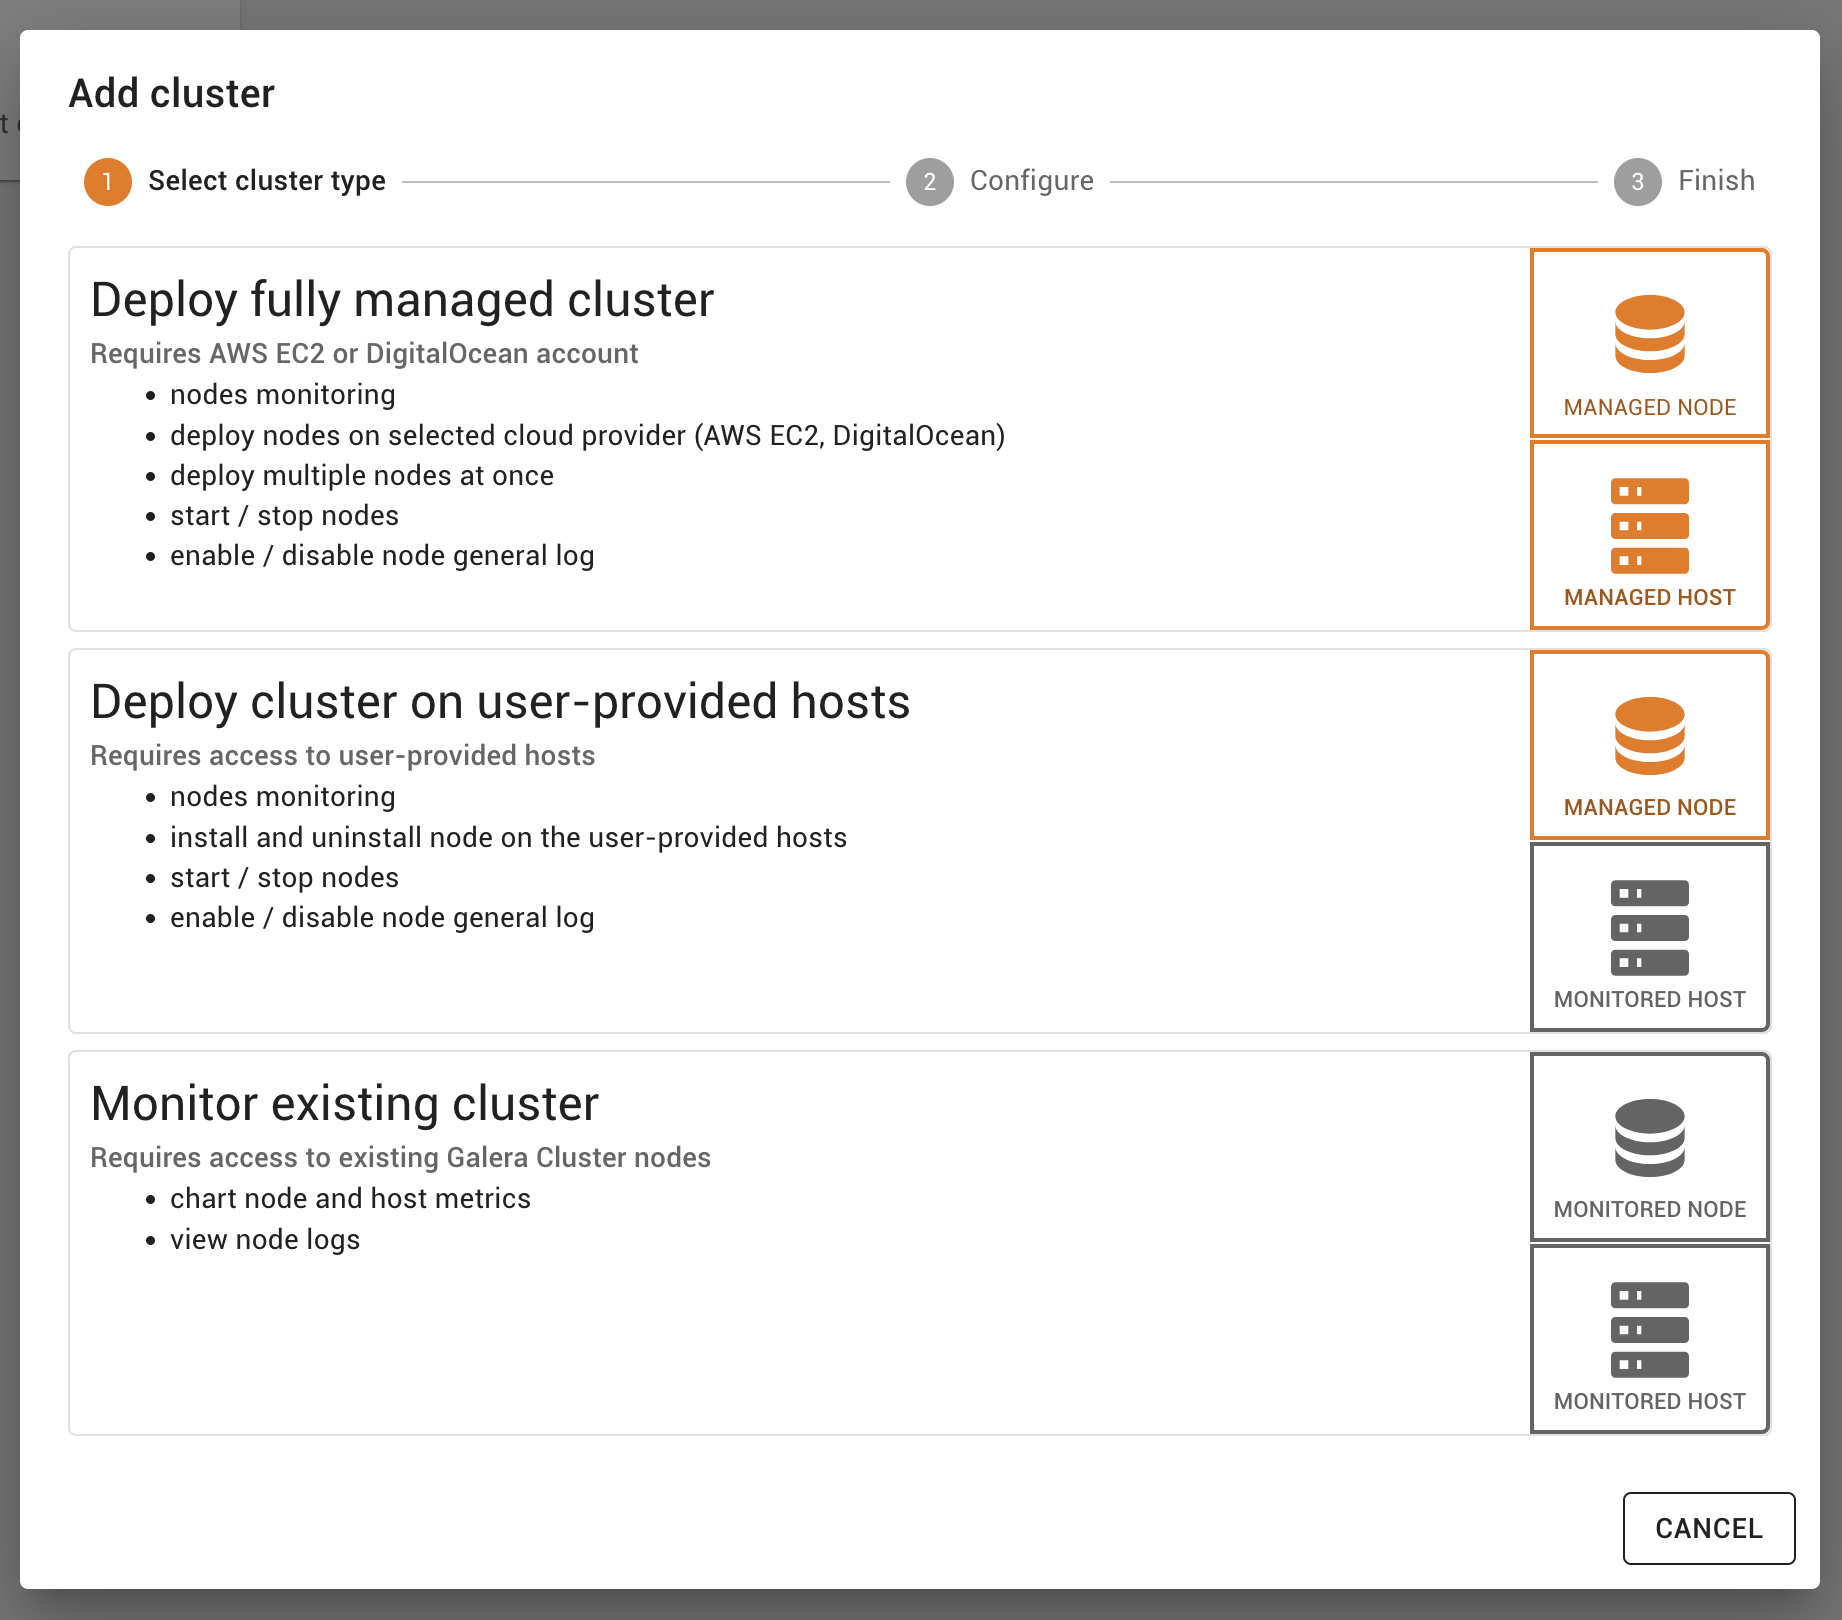
Logon via the web URL. As you can see, by default there are no clusters, and when you click on it, you are given options to deploy a fully managed cluster, or to deploy a cluster on user-provided hosts, and finally just to monitor an existing cluster. For the purpose of this document, we are going to take option 2, which is “Deploy cluster on user-provided hosts”.
You now have to create the cluster type, and what database engine you are choosing. Don’t forget to give your cluster a name! Galera Manager can manage multiple clusters in one instance.
Almost immediately after, you’re told to copy the SSH keys into every host you plan to deploy to. A point to note, is that if you select the copy icon, and do this over HTTP, you will get an error saying, “Couldn’t copy public key”; this is a security measure, as the copy functionality only works over HTTPS. You will actually have to select, and manually copy the SSH key using Ctrl+C/Command+C, etc. You have to have this SSH key on all hosts in /root/.ssh/authorized_keys. Only once you have ticked “I have added public key to /root/.ssh/authorized_keys file on all nodes” can you move on in the installation.

Now it is time to click: Add node. The popup should now enable you to add an SSH address, and don’t forget to give it a node name. One thing we like to ensure is that the SSH access is working, so you really should click Check Access and ensure that the SSH connection is working sufficiently. Then go right ahead and Deploy.

This is a blocking operation, and you can only deploy each node one-by-one. Repeat the process for nodes 2 and 3.
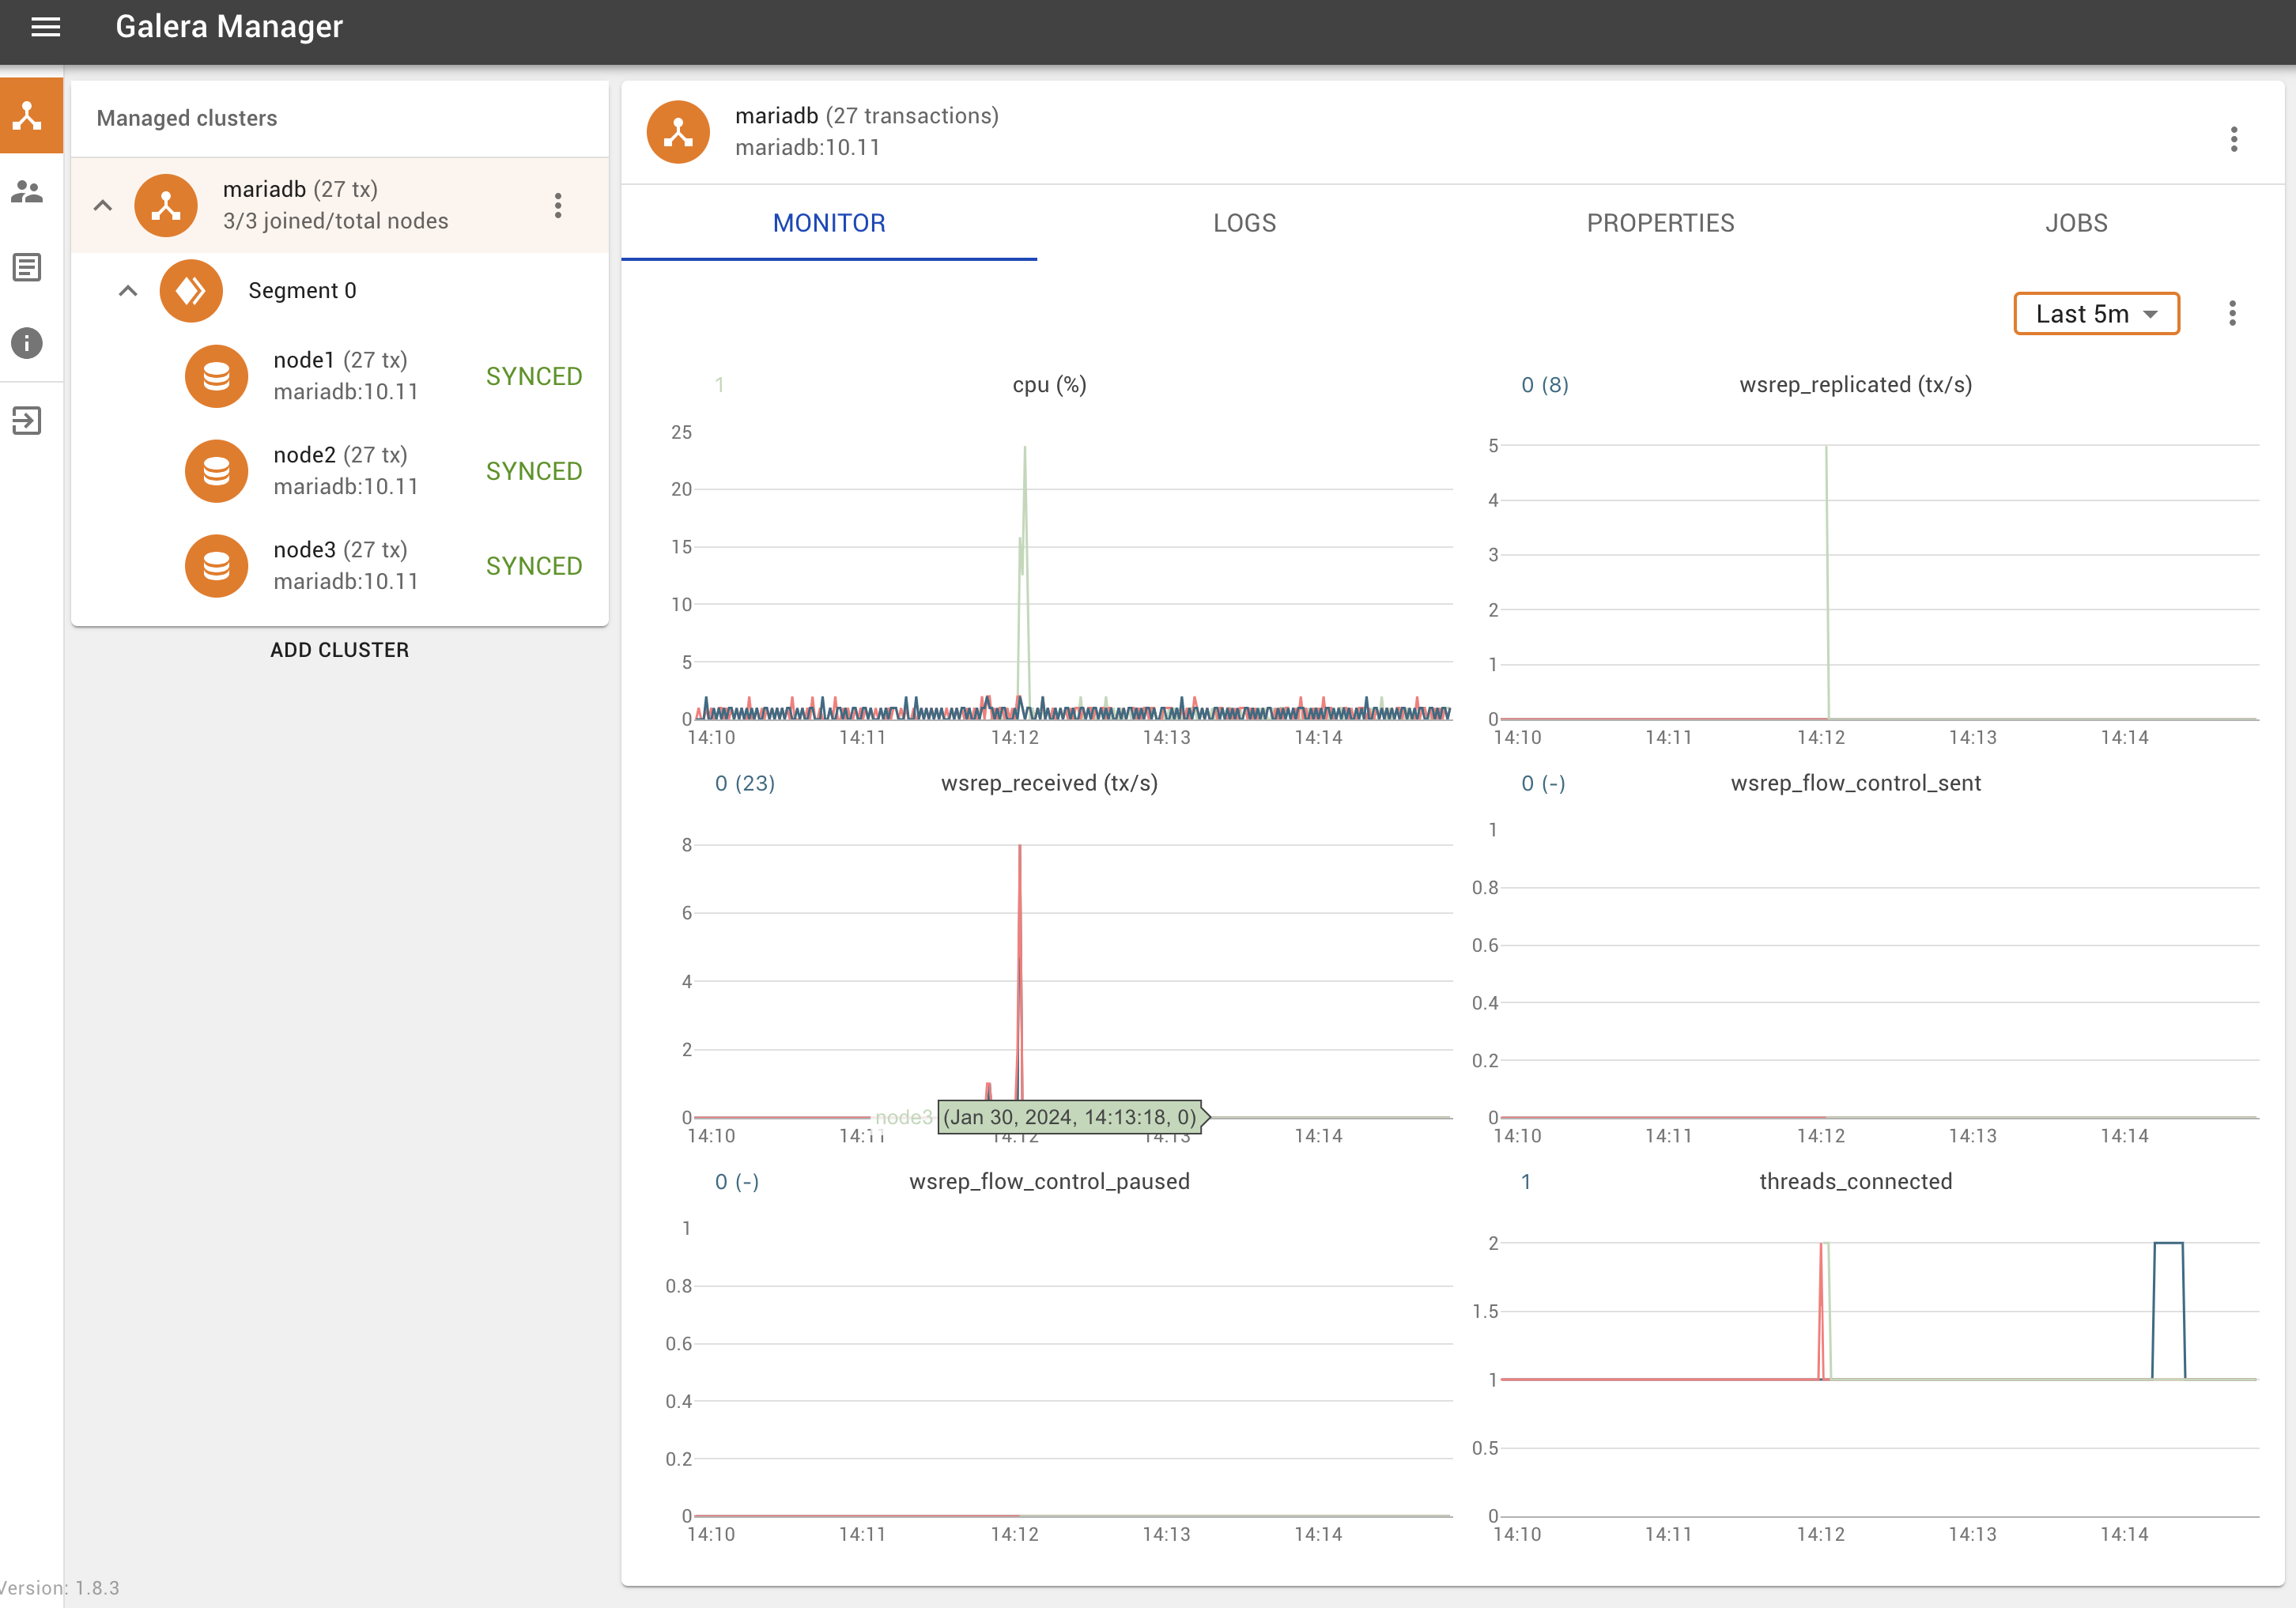
Voila! You now have a 3-node MariaDB Galera Cluster, deployed by Galera Manager, and one you can fully manage through the GUI.
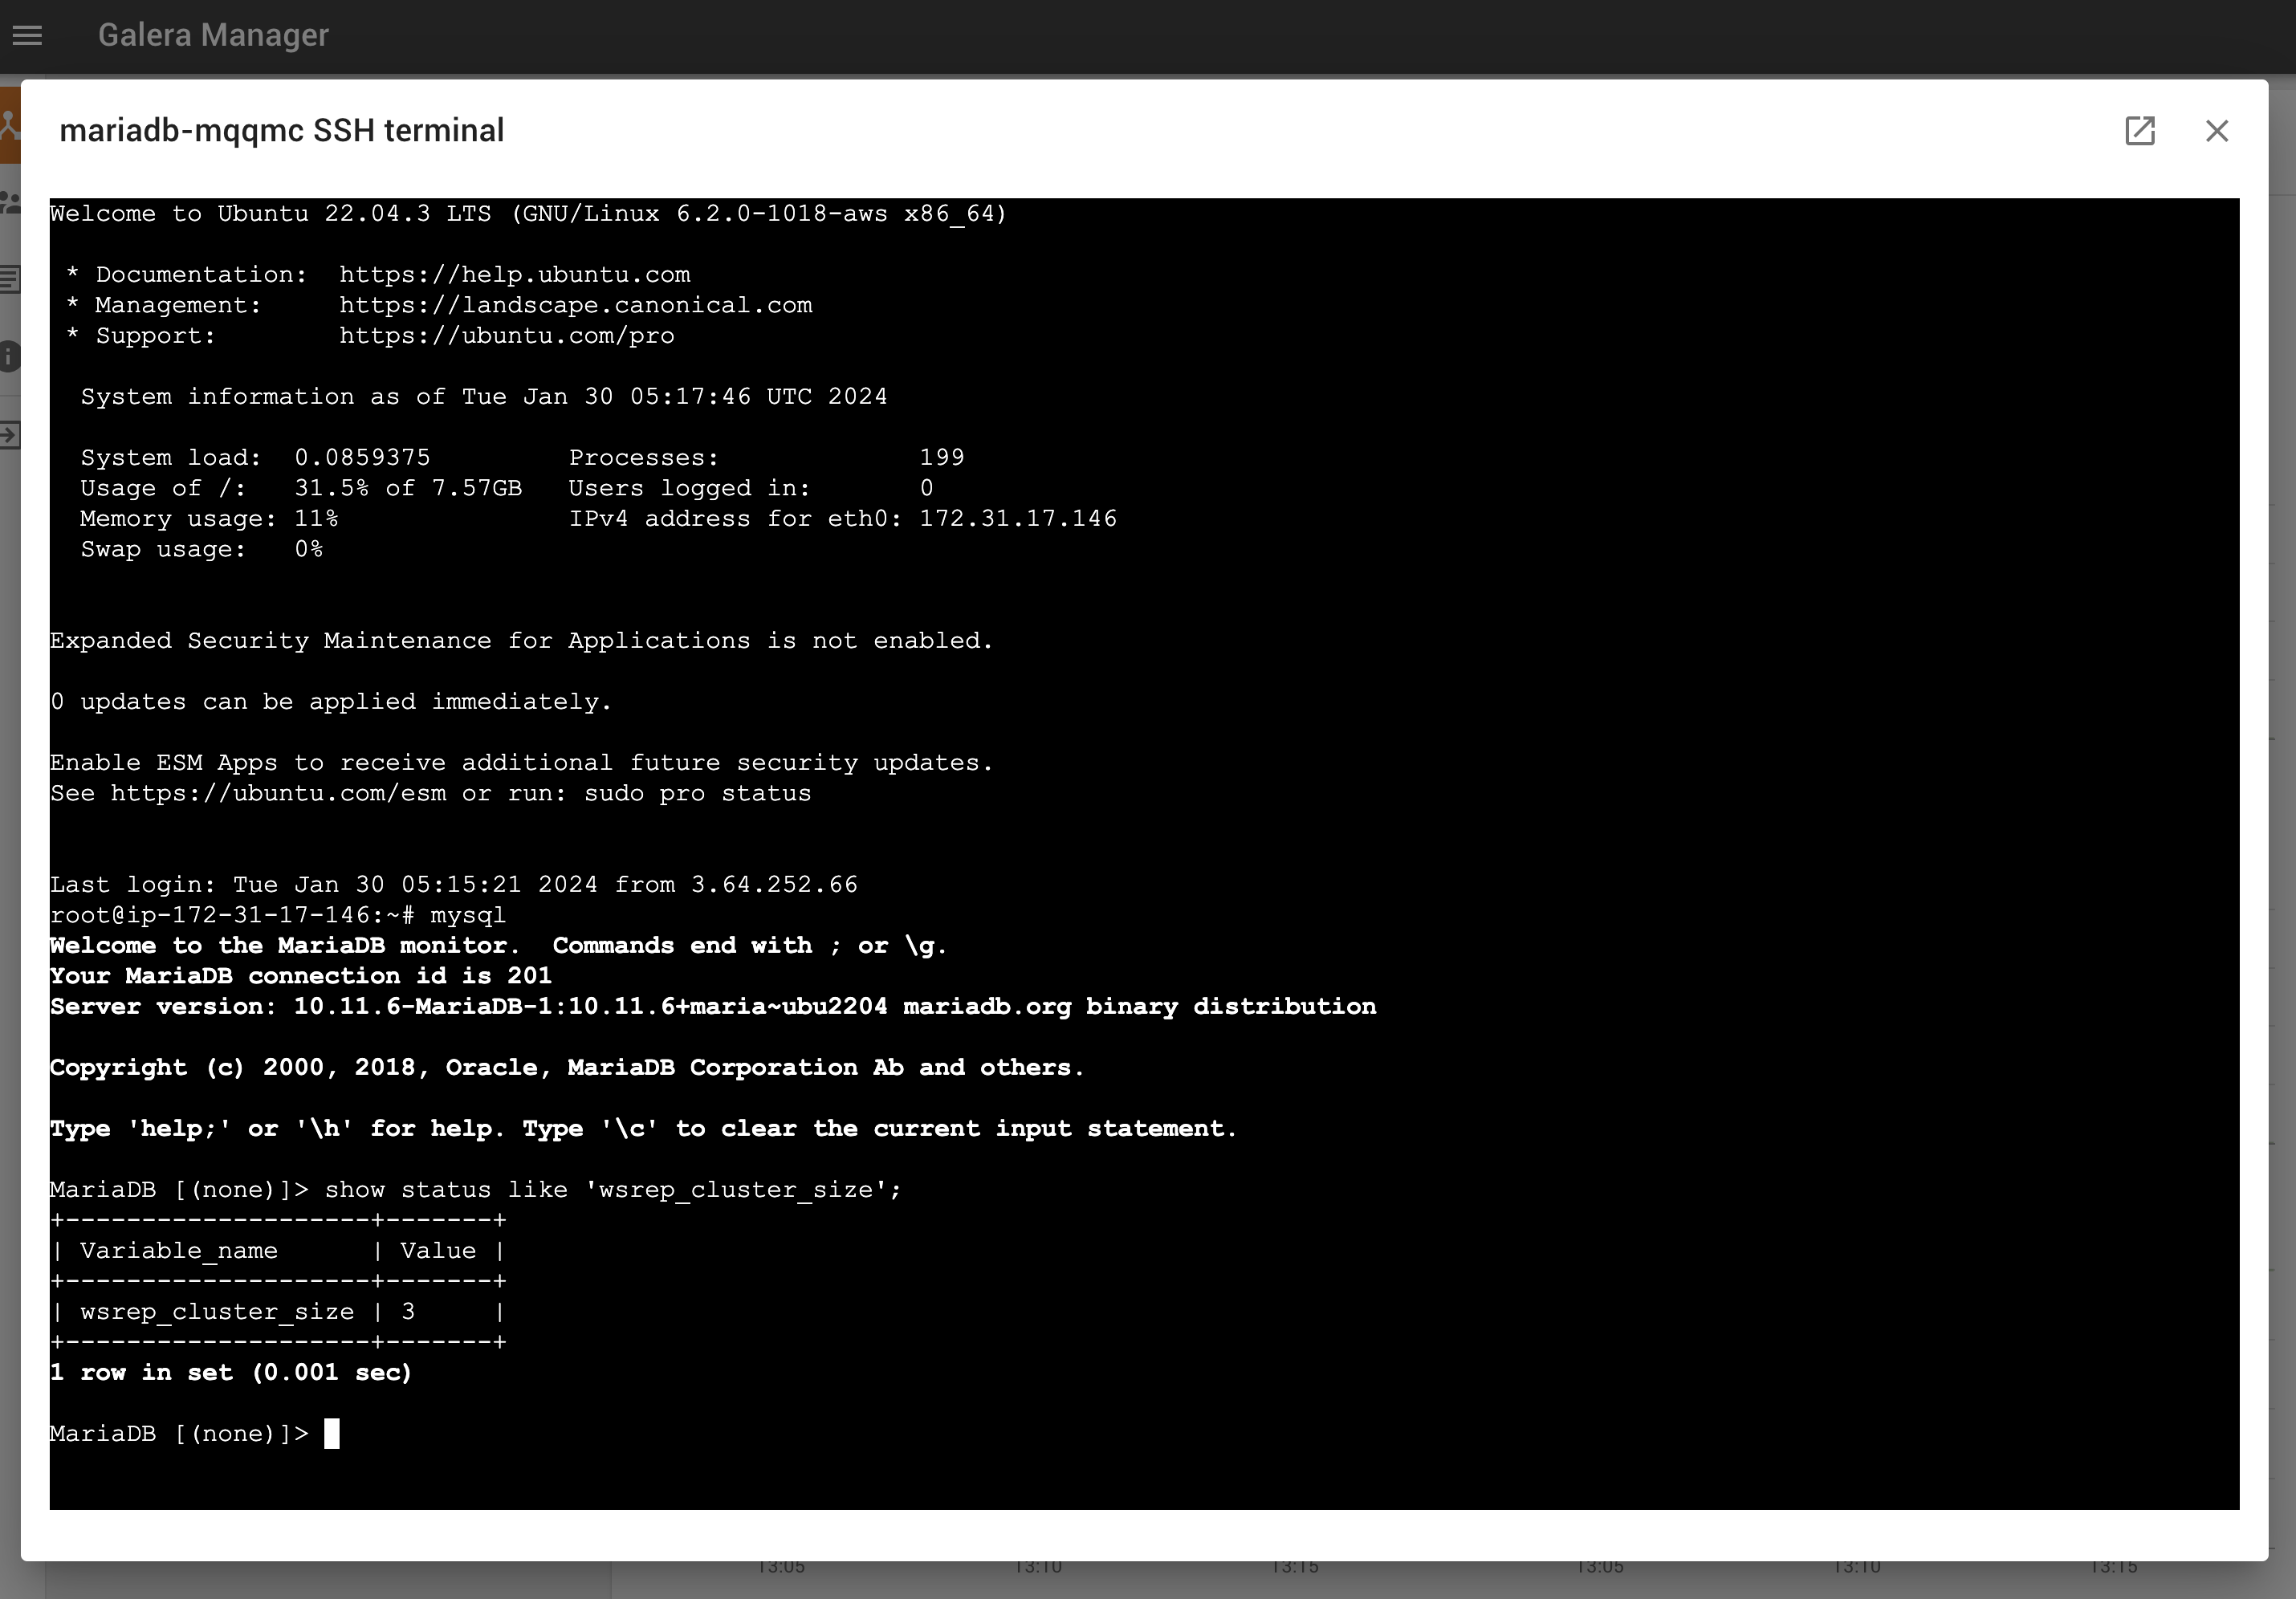
You can SSH into any of your hosts, and you will be able to login without a password, and execute mysql to login.
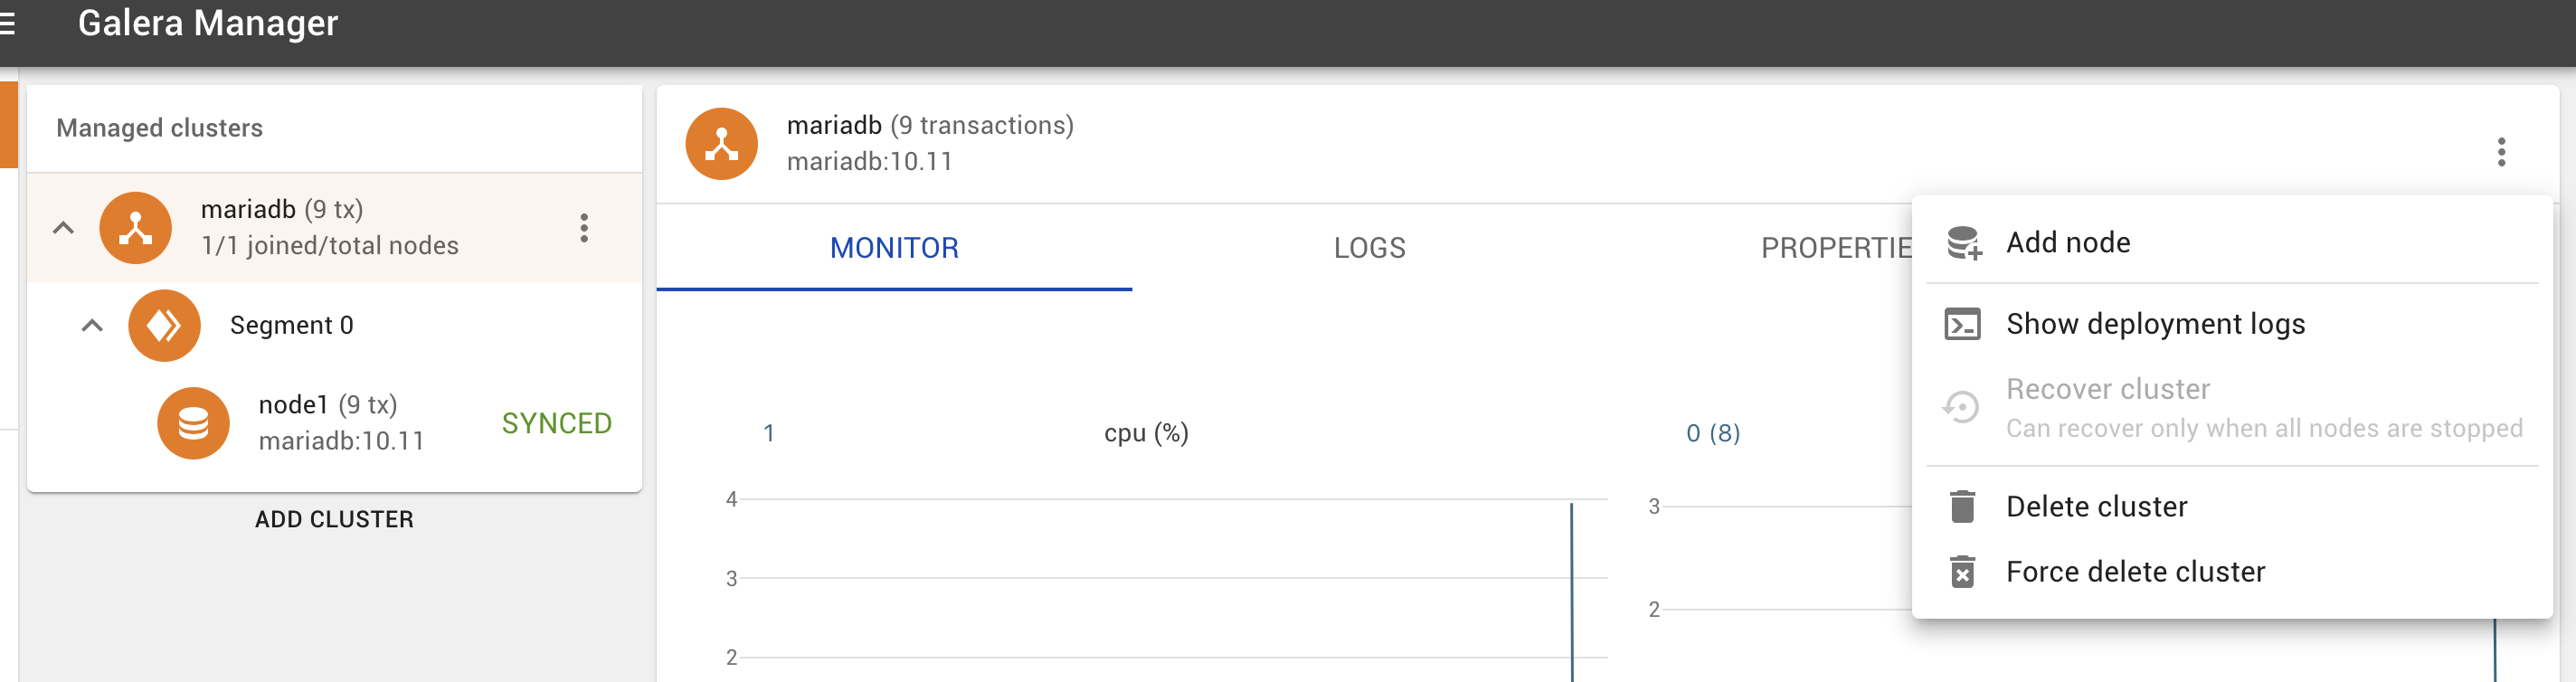
With Galera Manager, you can also stop the node, restart it, delete a node, but better yet, you can also have a browser-based SSH Terminal. Naturally you can add monitoring metrics, change the frequency, and so much more.
Happy deploying your MariaDB Galera Clusters in Amazon EC2 with Galera Manager!