Adding Nodes with Galera Manager
After you’ve created a cluster, set the defaults for nodes within Galera Manager, you will need to add nodes to that cluster.
.. When you add nodes to a cluster, Galera Manager will add hosts on AWS (Amazon Web Services) and install all of the software needed, including either MySQL or MariaDB. It will then configure mysqld to be a node in the cluster.
If you haven’t yet created a cluster, read the Deploying a Cluster in Galera Manager page—installing Galera Manager is covered in the Installing Galera Manager page.
Node & Host Deployment
To add nodes to a cluster, after logging into Galera Manager from a web browser, click on the cluster in the left margin. In the main panel, click then on the vertical ellipsis in the top right margin. When you do, a small box (see Figure 1 below) will offer you two choices: to add a node or to delete the cluster. Click on Add Node.

Close-Up of Menu to Change a Cluster (Figure 1)
After you click Add Node, a large box like the one shown in the screenshot below in Figure 2 will appear. Here you will provide your preferences for the node or nodes, and the hosts you want to add.
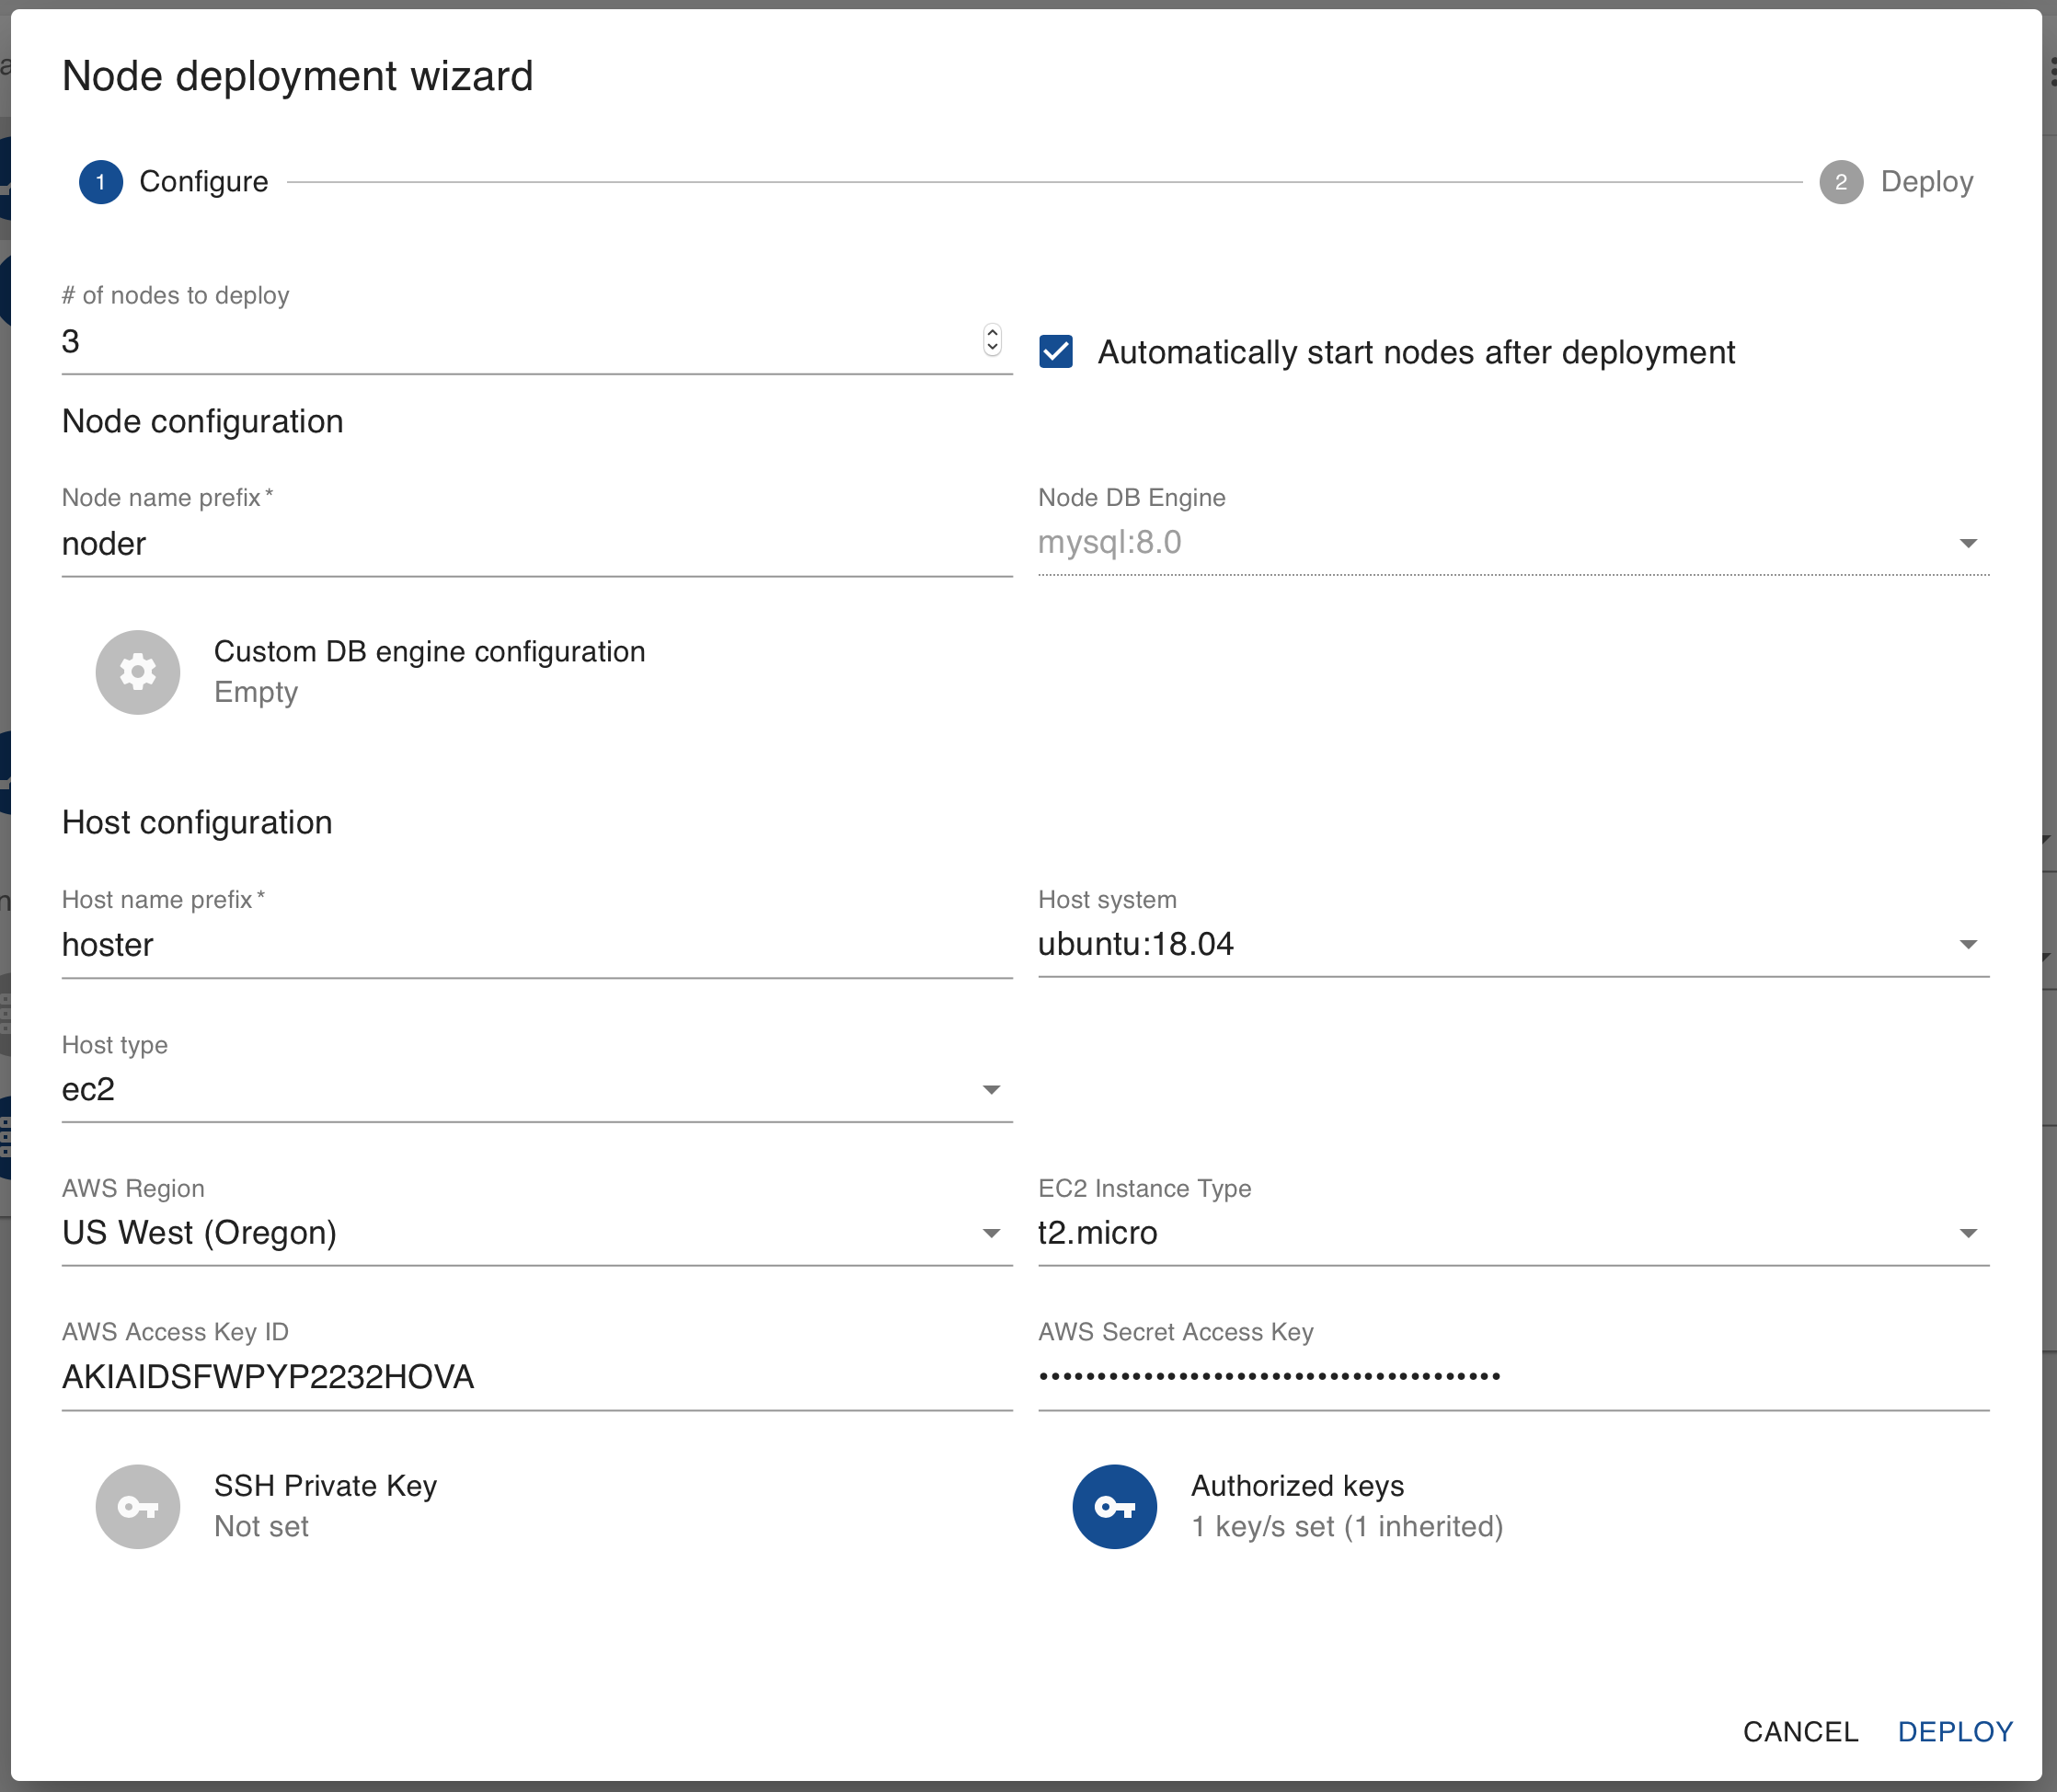
Node Deployment for a Cluster (Figure 2)
The first field at the top left of the Node Deployment Wizard is to enter the number of nodes you want to add, depending on the host type of the node. If the host is managed by Galera Manager (for example EC2 host type), then Galera Manager can automatically provision and set up several nodes at once. If hosts for the nodes are provided by the user (unmanaged host type), then each node will have to be added individually.
In the example here, we are creating a cluster in AWS EC2, so 3 has been entered. By default, the nodes will be started automatically after the hosts have been provisioned and then nodes set up.
Node Deployment Choices
Next, you will enter specific information on this node or set of nodes. To make discussing easier, below is the screenshot from Figure 2, but cropped around the default node configuration section:

Node Configuration (Figure 3)
At a minimum, you would enter the prefix for naming nodes. If you are creating only one node, what you enter here will be used. If you are creating multiple nodes, this text will be used as a prefix to each node’s name. The suffix of the node name will be randomly generated. If it is important to you to name each node, you will need to add them one at a time to the cluster.
The database system and version is already set from when you created the cluster. You have to use the same database system for each node. However, although the custom database settings you might have added at that time will be passed to the nodes—if you are creating nodes one at a time—you may give one node extra settings depending on their hardware and operational purpose. You probably wouldn’t do this with the initial set of nodes, but later when you are adding temporarily another node because of a surge in traffic, you might want the extra node to handle more traffic. Therefore, you may want to set its buffers and other settings to higher values. You can add those settings then for the one node.
Host Deployment Choices
The next part of the Node Deployment Wizard, shown in the cropped screenshot below, relates to configuring the hosts. By default host setting are inherited from the cluster values, but you can change them for particular host here. If you are adding a host that is not created by Galera Manager, here you will need to provide private SSH key for Galera Manager root access to the host. Host defaults are explained in the Default Host Configuration section of the Deploying a Cluster in Galera Manager documentation page.
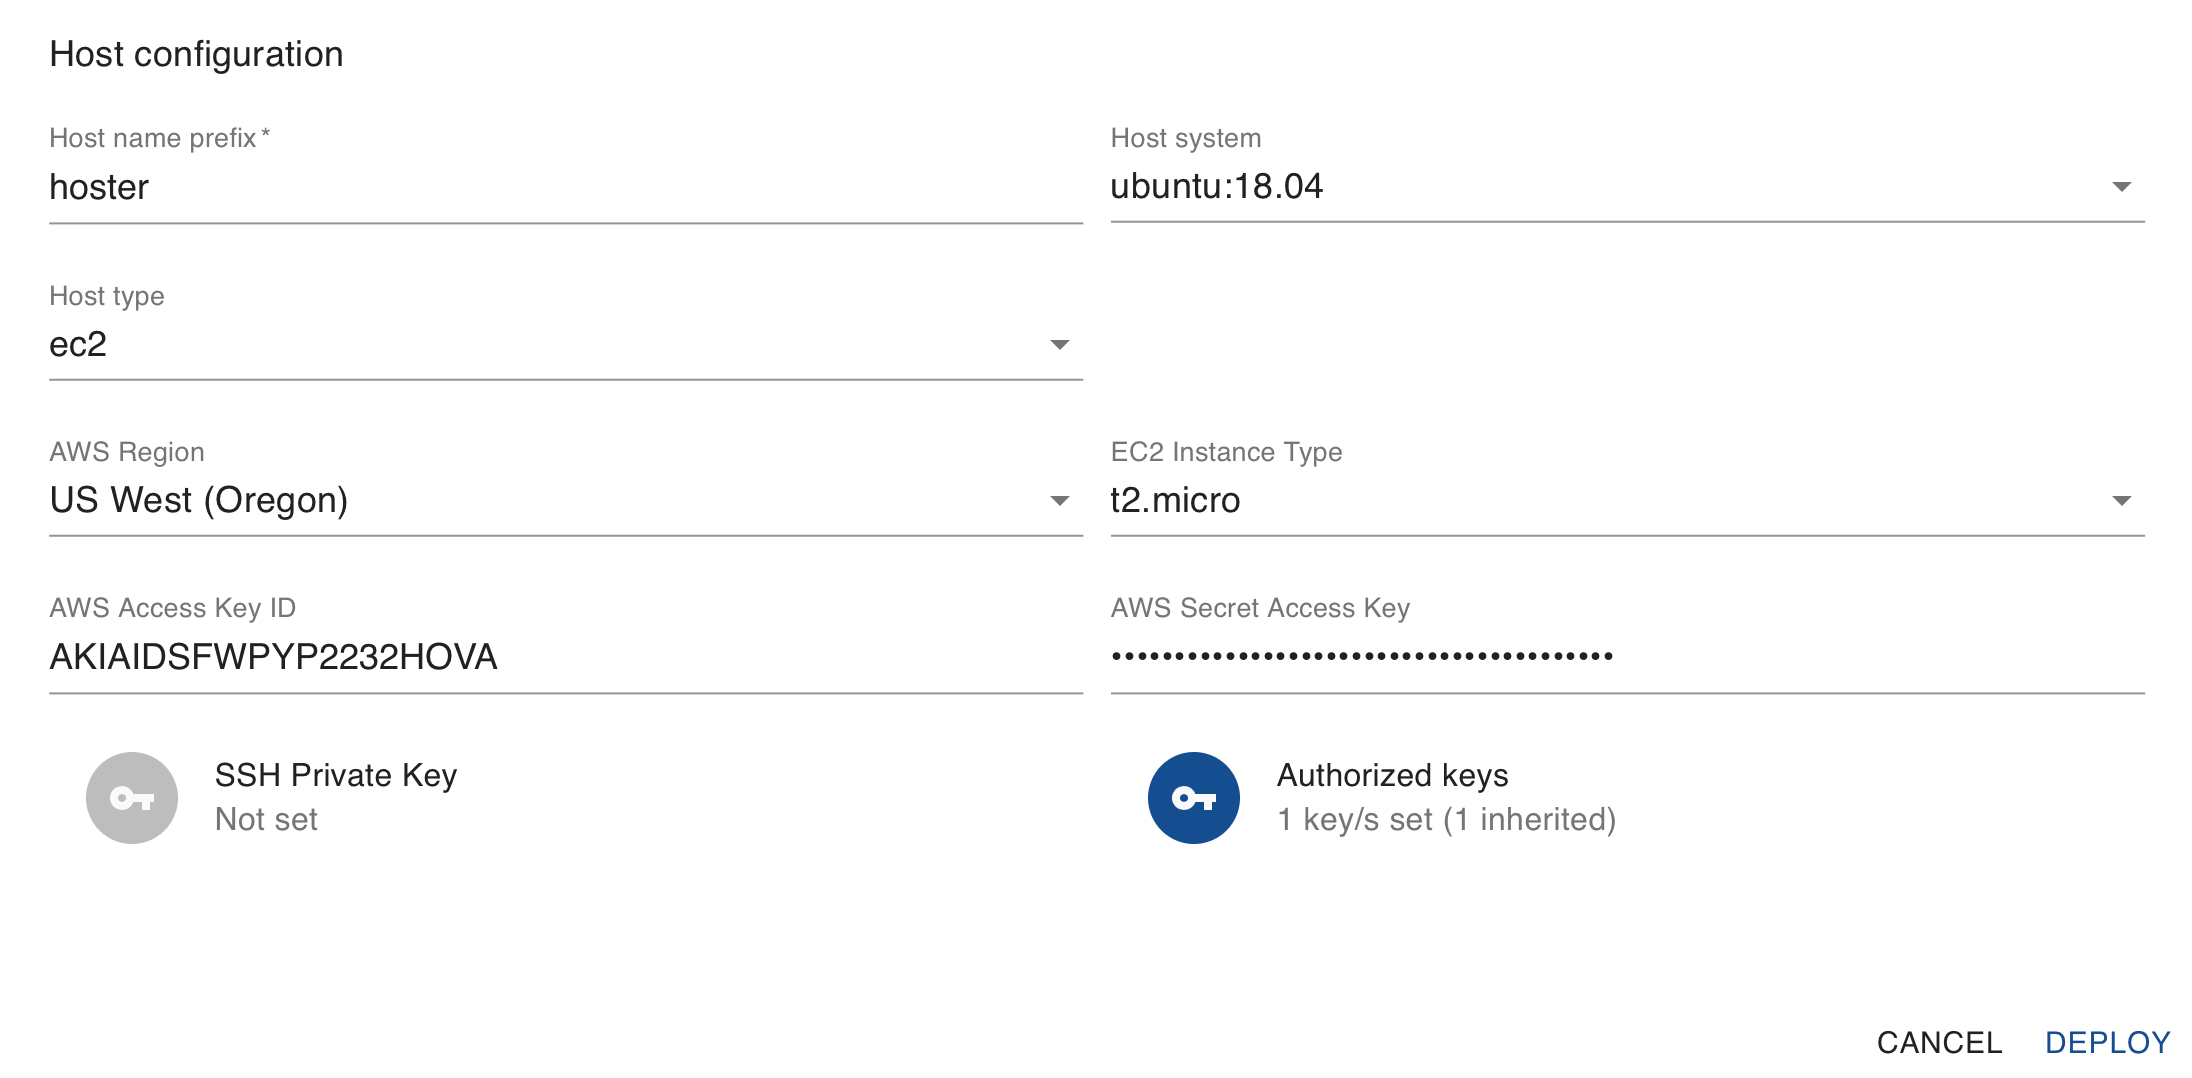
Host Configuration (Figure 4)
Being able to make different choices for the host when adding nodes is particularly useful when adding nodes to an existing and running cluster. For example, if you are adding temporarily a node because of an increase in traffic, you might want to use a larger server. To do this, you would select a different EC2 Instance Type, one with more memory and processing power. If you want to migrate to a new release of Linux, you can add new nodes with that choices. After they’ve synchronized, you could then delete the old nodes.
Finishing Deployment
After you finish entering the number of nodes in the Node Deployment Wizard, and the node and host names, as well as any changes you want to make to the default settings, you would then click on Deploy in the right-hand corner. A small box, like the one below, will appear in which you can observe the progress of the hosts and nodes being deployed. Note, here we illustrate an example of adding nodes in AWS EC2, which involves automatic provisioning of EC2 instances for hosts, installing cluster and monitoring software, and finally starting up the nodes)
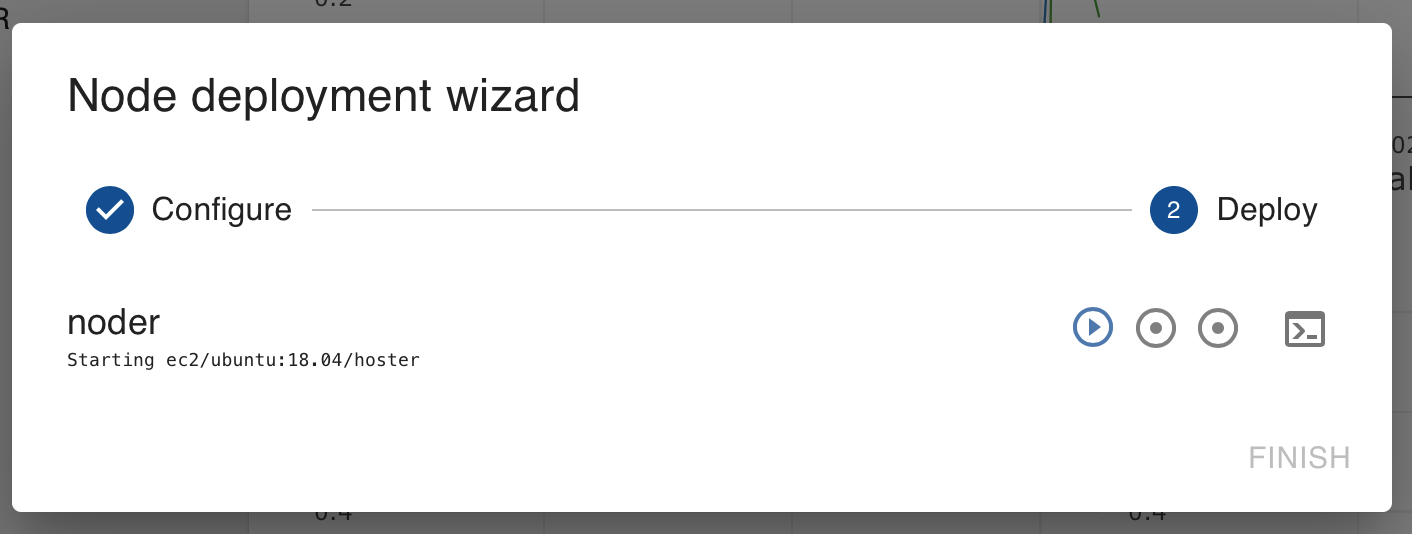
Progress of Adding Nodes (Figure 5)
The deployment process may take some time. If it fails, you will see in the small red text at which point it failed. You can also check the Logs and Jobs tabs for the cluster and node for more information. When the node deployment succeeds, all of the circled-dot and right-arrow play buttons on the right (see Figure 5) will change to check marks and the Finish link will become active. Click on that link to close the box when it is done.
Finished Results
When the Node Deployment Wizard has finished running and you’ve closed the related box, you will see the nodes that were added listed in the left margin, under the name of the cluster. The results should look similar to the screenshot below in Figure 6 below:
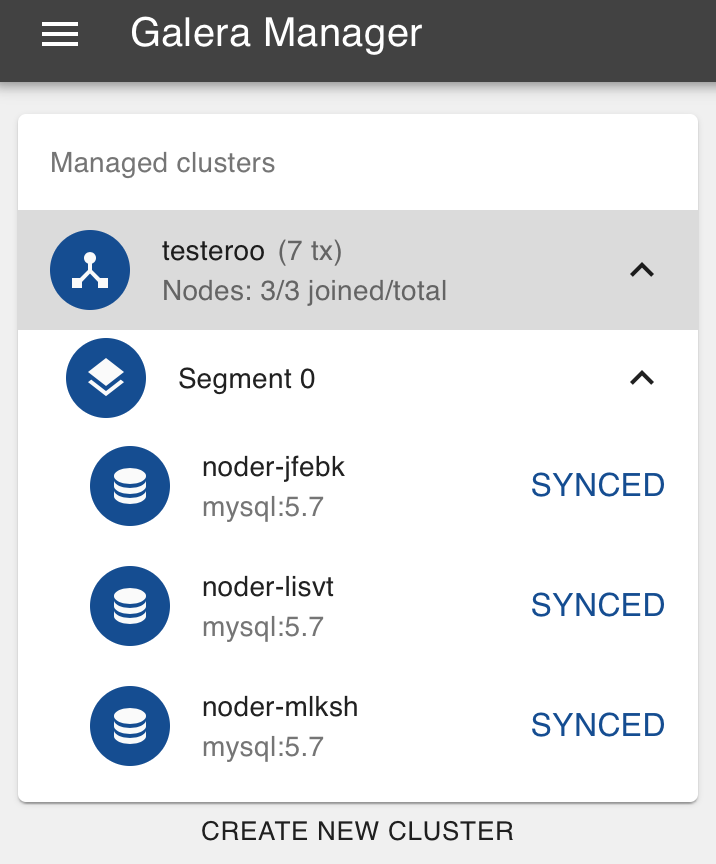
Left Margin with Results of Adding Three Nodes (Figure 6)
Notice that although a node name of noder was entered, some extra text was added to make each node name unique (for example, noder-jfebk). As mentioned earlier, if you add one node at a time, you can name each and no suffix will be appended.
If you chose to have the nodes started automatically, they should all have a status of Synced. If one wasn’t started automatically, click on the node in the left margin, and then click on the vertical ellipsis at the top right of the main panel. From the choices you are offered there, click Start to start the node.
Now that we created our cluster in AWS EC2, Galera Manager has provisioned a EC2 instance for each node’s host. If you look in your EC2 console showing your Instances, you will see something like the screenshot below:

AWS Instances: Galera Manager and Three Hosts (Figure 7)
In this example, there’s one Instance, on which Galera Manager is installed. There’s an Instance for each node of the three in the cluster (for example, hoster-jfebk, etc.).
.. You see the host names because that’s the physical or virtual server on which the node and its software is running.
When you click on a node in the left margin of Galera Manager, you will see charts for monitoring the node’s activities. To start, it will be fairly empty like the screenshot below:

New Node in Galera Manager (Figure 8)
At this point, the charts are rather featureless. However, as you start to add data, which is covered in Loading Initial Data page of the documentation, you will start to see some activity. You can learn more about how to use these charts, as well as how to add other charts to track other metrics than these initial few, by reading the Monitoring a Cluster with Galera Manager page. You may also want to add other users to Galera Manager who can monitor and add clusters and nodes. This is covered on the Adding Users to Galera Manager page.
Galera Manager Documents