Today there is NEW ERA for Galera Cluster monitoring and management and as we release Galera Manager 1.0 into the wild for everyone to evaluate, test, and deploy their Galera Clusters within an Amazon Web Services (AWS) Elastic Compute Cloud (EC2) environment to achieve MySQL High Availability, Multi-Master MySQL on the cloud and Disaster Recovery, all from the comfort of a web-based graphical user interface (GUI).
What does Galera Manager do? Galera Manager is a deployment, management and monitoring solution for Galera Clusters. A user can easily create clusters, add and remove nodes, and create geo-distributed clusters across multiple AWS regions, all with the click of a few buttons in one’s web browser. Even more useful is the over 620 monitoring metrics available to monitor the health of your clusters. Being fully web-based, you can say goodbye to having to access a console, configure the my.cnf’s individually, and bootstrap a cluster from scratch. Galera Manager brings Galera Cluster for the rest of us, beyond just DBAs!
Galera Manager is the tool to deploy Galera Clusters within an AWS EC2 environment.
You can start with t2.micro instances for all your needs during evaluation, but naturally you are expected to launch more powerful instances for production use cases. Currently, Galera Manager allows you to create a new Galera Cluster with either MySQL 5.7 or MySQL 8.0. It supports the base operating system to be CentOS 7, Ubuntu 18.04 LTS and Ubuntu 20.04 LTS.
It is well documented: The Galera Manager and should be considered the prime place to get information about Galera Manager.
Let’s get started with an install! You will need four (4) t2.micro instances, for when it comes to budgeting, but this is also AWS free-tier eligible. Create an EC2 node with SSH access in any region that you prefer. For simplicity, Amazon Linux 2 was chosen as the base operating system (as it remains largely compatible with CentOS). For ease of use, run this as root (sudo su or the likes will suffice).
Once SSH’ed into your instance, you will need to download the installer:
wget https://galeracluster.com/galera-manager/gm-installer
After that, you should make it executable, by executing: chmod +x gm-installer. Start the installer via: ./gm-installer install.
You will have to accept the End User License Agreement (EULA). Most things can be left at a default, and you can follow on the install documentation, but it is worth noting that when it comes to domains & certificates, if you choose to enter an IP address (quite the default when you’re testing and using AWS), you will get a warning stating: Since you entered an IP address, SSL won't be available. There are some implications for this, i.e. everything going around in plaintext, including your AWS credentials, over HTTP as opposed to HTTPS. However, you will get setup for evaluation a lot faster.
Once all that is done, wait for the installer to complete. This takes a few minutes. You will see a message displayed as such (your IP address or hostname will vary of course):
INFO[0143] Galera Manager installation finished. Enter http://34.228.140.255 in a web browser to access. Please note, you chose to use an unencrypted http protocol, such connections are prone to several types of security issues. Always use only trusted networks when connecting to the service.
You will also note that there are Logs and Metrics database URLs, and you can safely ignore this. You do however need to open up some ports within the firewall within Amazon (you do this via Security Groups). The ports in question are: 80, 443, 8091, 8092 and we have documented it at AWS Ports with Galera Manager. This happens immediately, and it will be in addition to port 22 (SSH) which is already open.
Now you can access your Galera Manager via any web browser. Login with the credentials you provided earlier, and you can get started in creating your first 3-node cluster. Start first by creating a cluster. While you can provide a “Custom DB engine configuration”, I would advise against this as you are trying to get started as quickly as possible. However if you choose to do so, please refer to the guide in Deploying a Cluster in Galera Manager. Pick your AWS region for the initial cluster setup, configure what DB engine you want, what the host OS should be running and get your AWS Access Key ID and AWS Secret Access Key from your AWS console. For more information, do read: Understanding and getting your AWS credentials (however we also do cover it in the above linked documentation piece). It is crucial to provide an SSH authorised key to ensure that you are able to login to the servers that your Galera Clusters are being deployed.
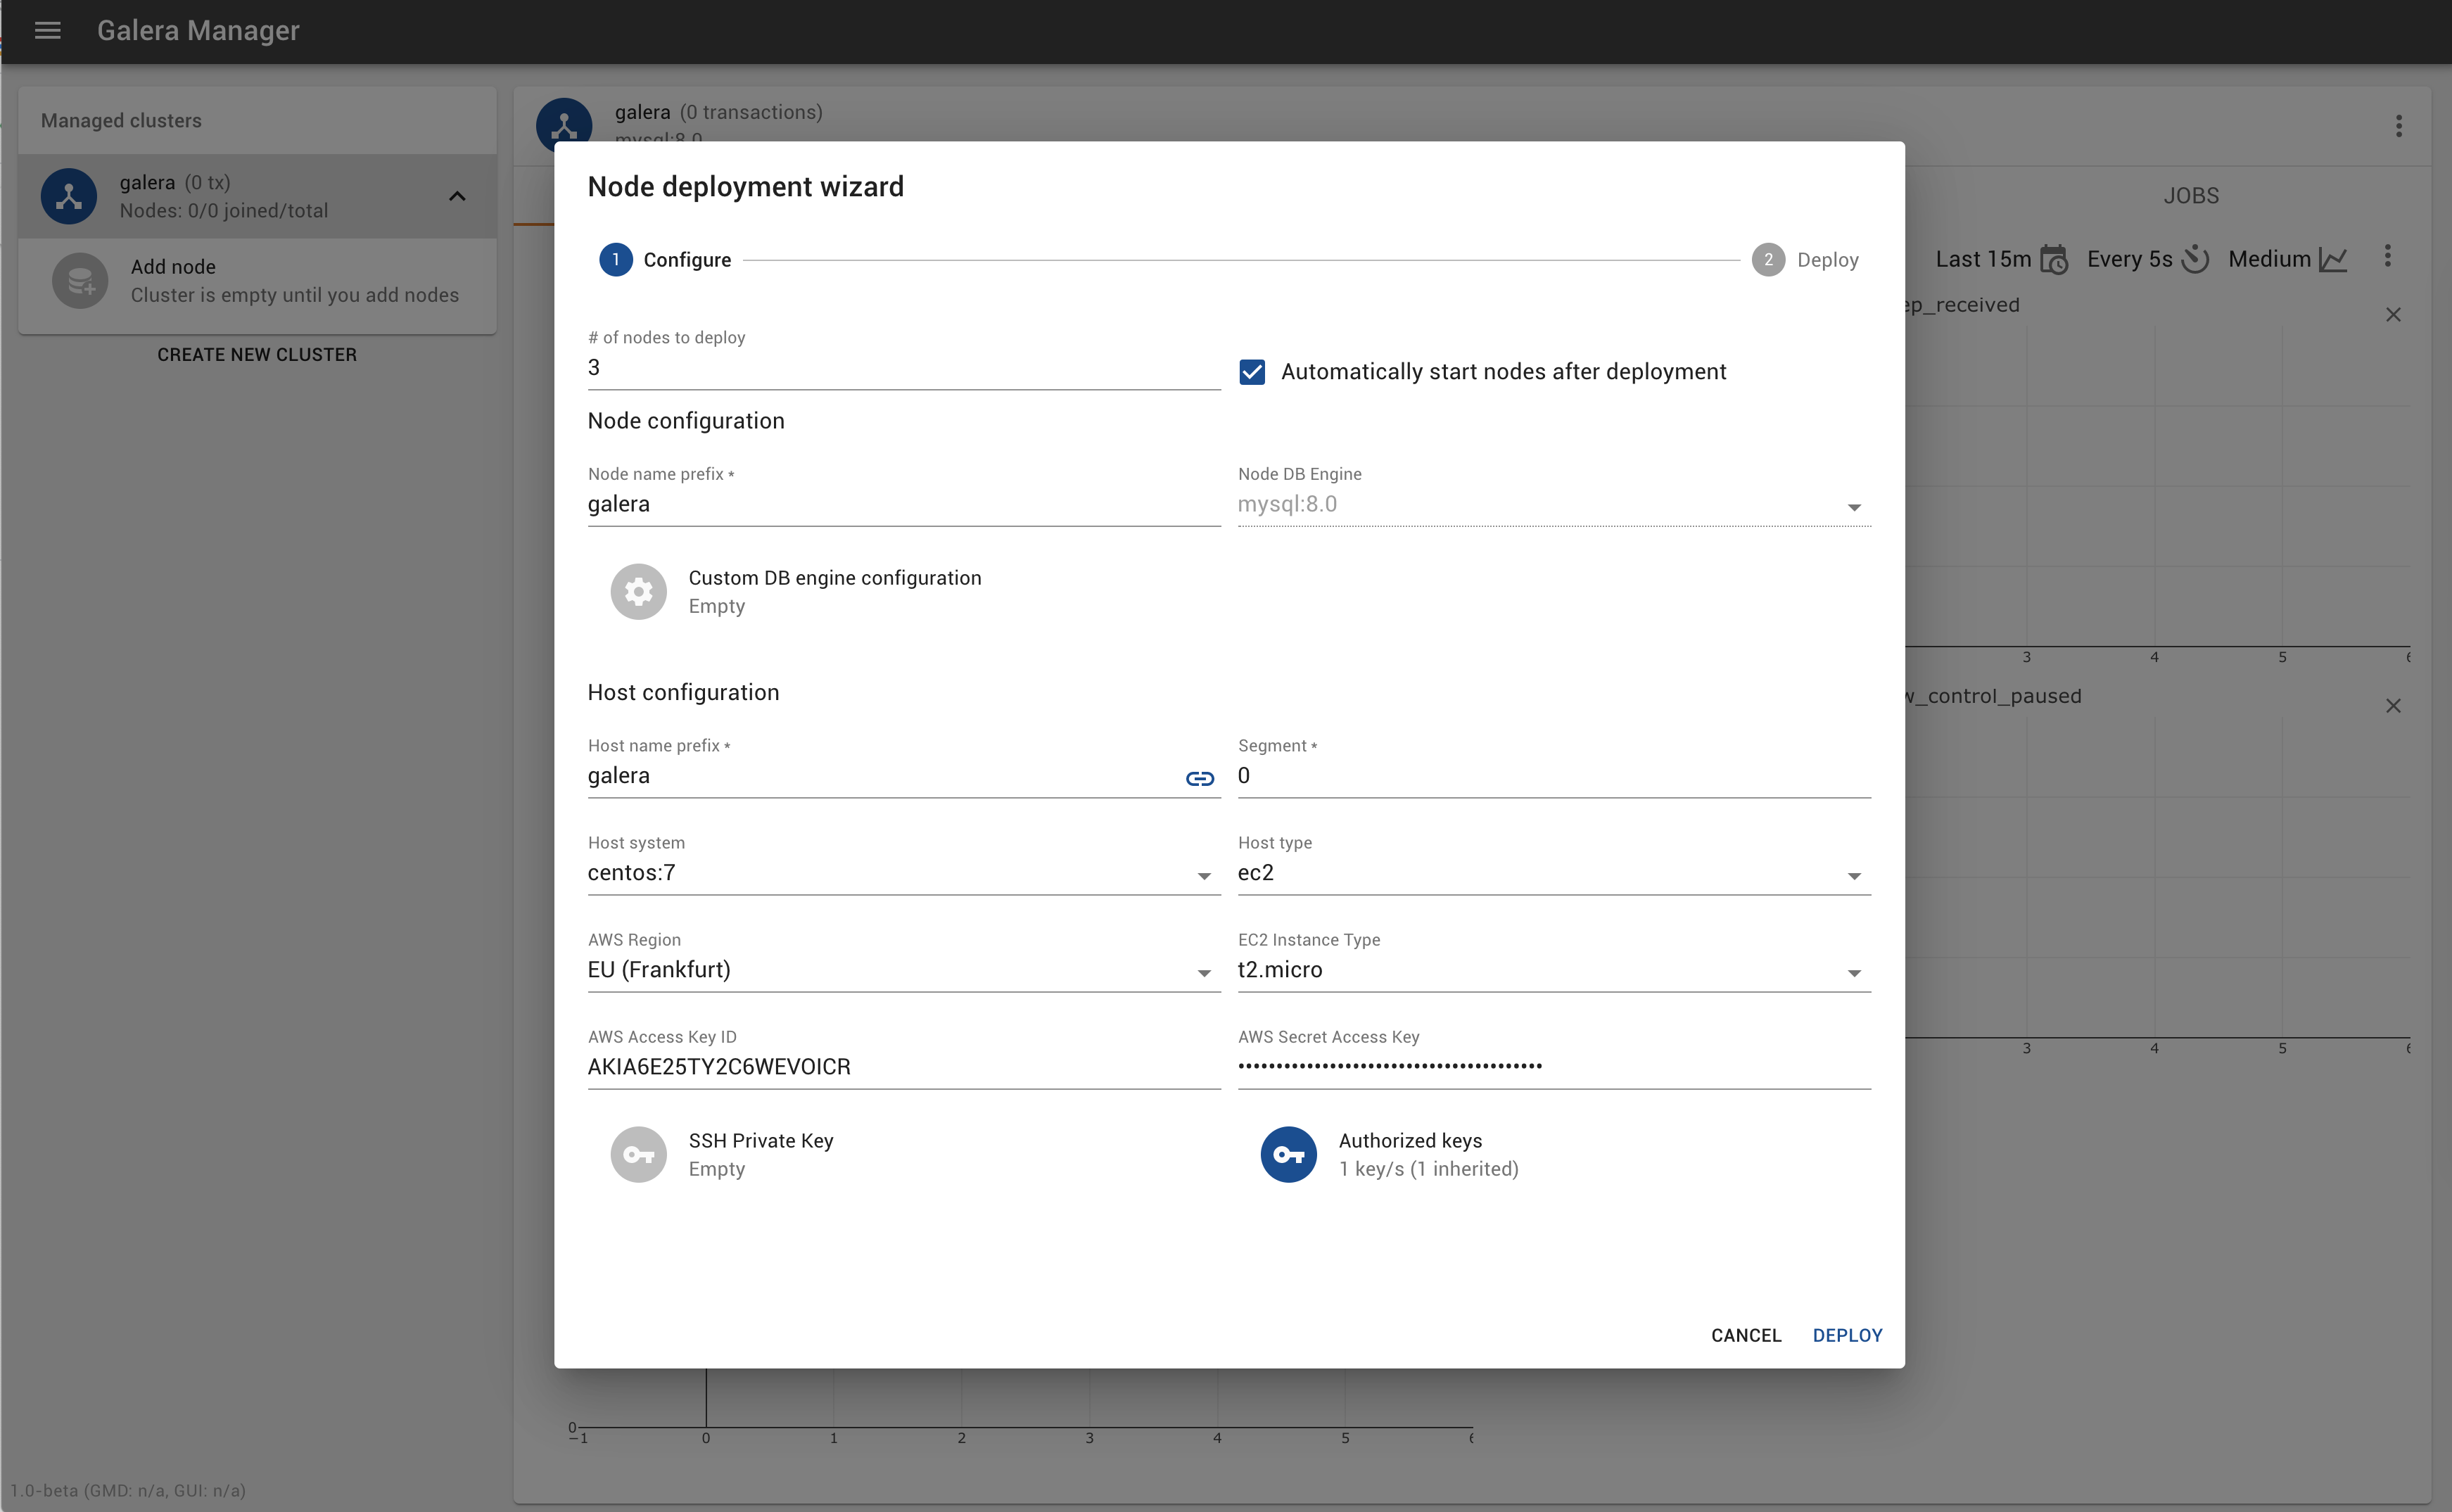
Once your cluster is created, you need to create some nodes within it. Galera Cluster runs best with a minimum of 3-nodes, and it is recommended that you deploy as such. You can opt to automatically start nodes after deployment. You can also choose to segment it here, but generally, the defaults are all you will need to get going. Here you can also choose your instance type (note that this is different from where you installed Galera Manager; the software itself runs fine with a t2.micro, but your needs may vary when it comes to a production cluster as AWS EC2 has multiple instance types that can be suited to your workload). Your region can also be different from where you installed Galera Manager (you might notice that it defaults to Frankfurt). As for the host type, you’ll notice that there is ec2 as the default and locallxd as well; for the purposes of this, you should just leave it to ec2 (though this helps you see where we are headed to from a roadmap standpoint).
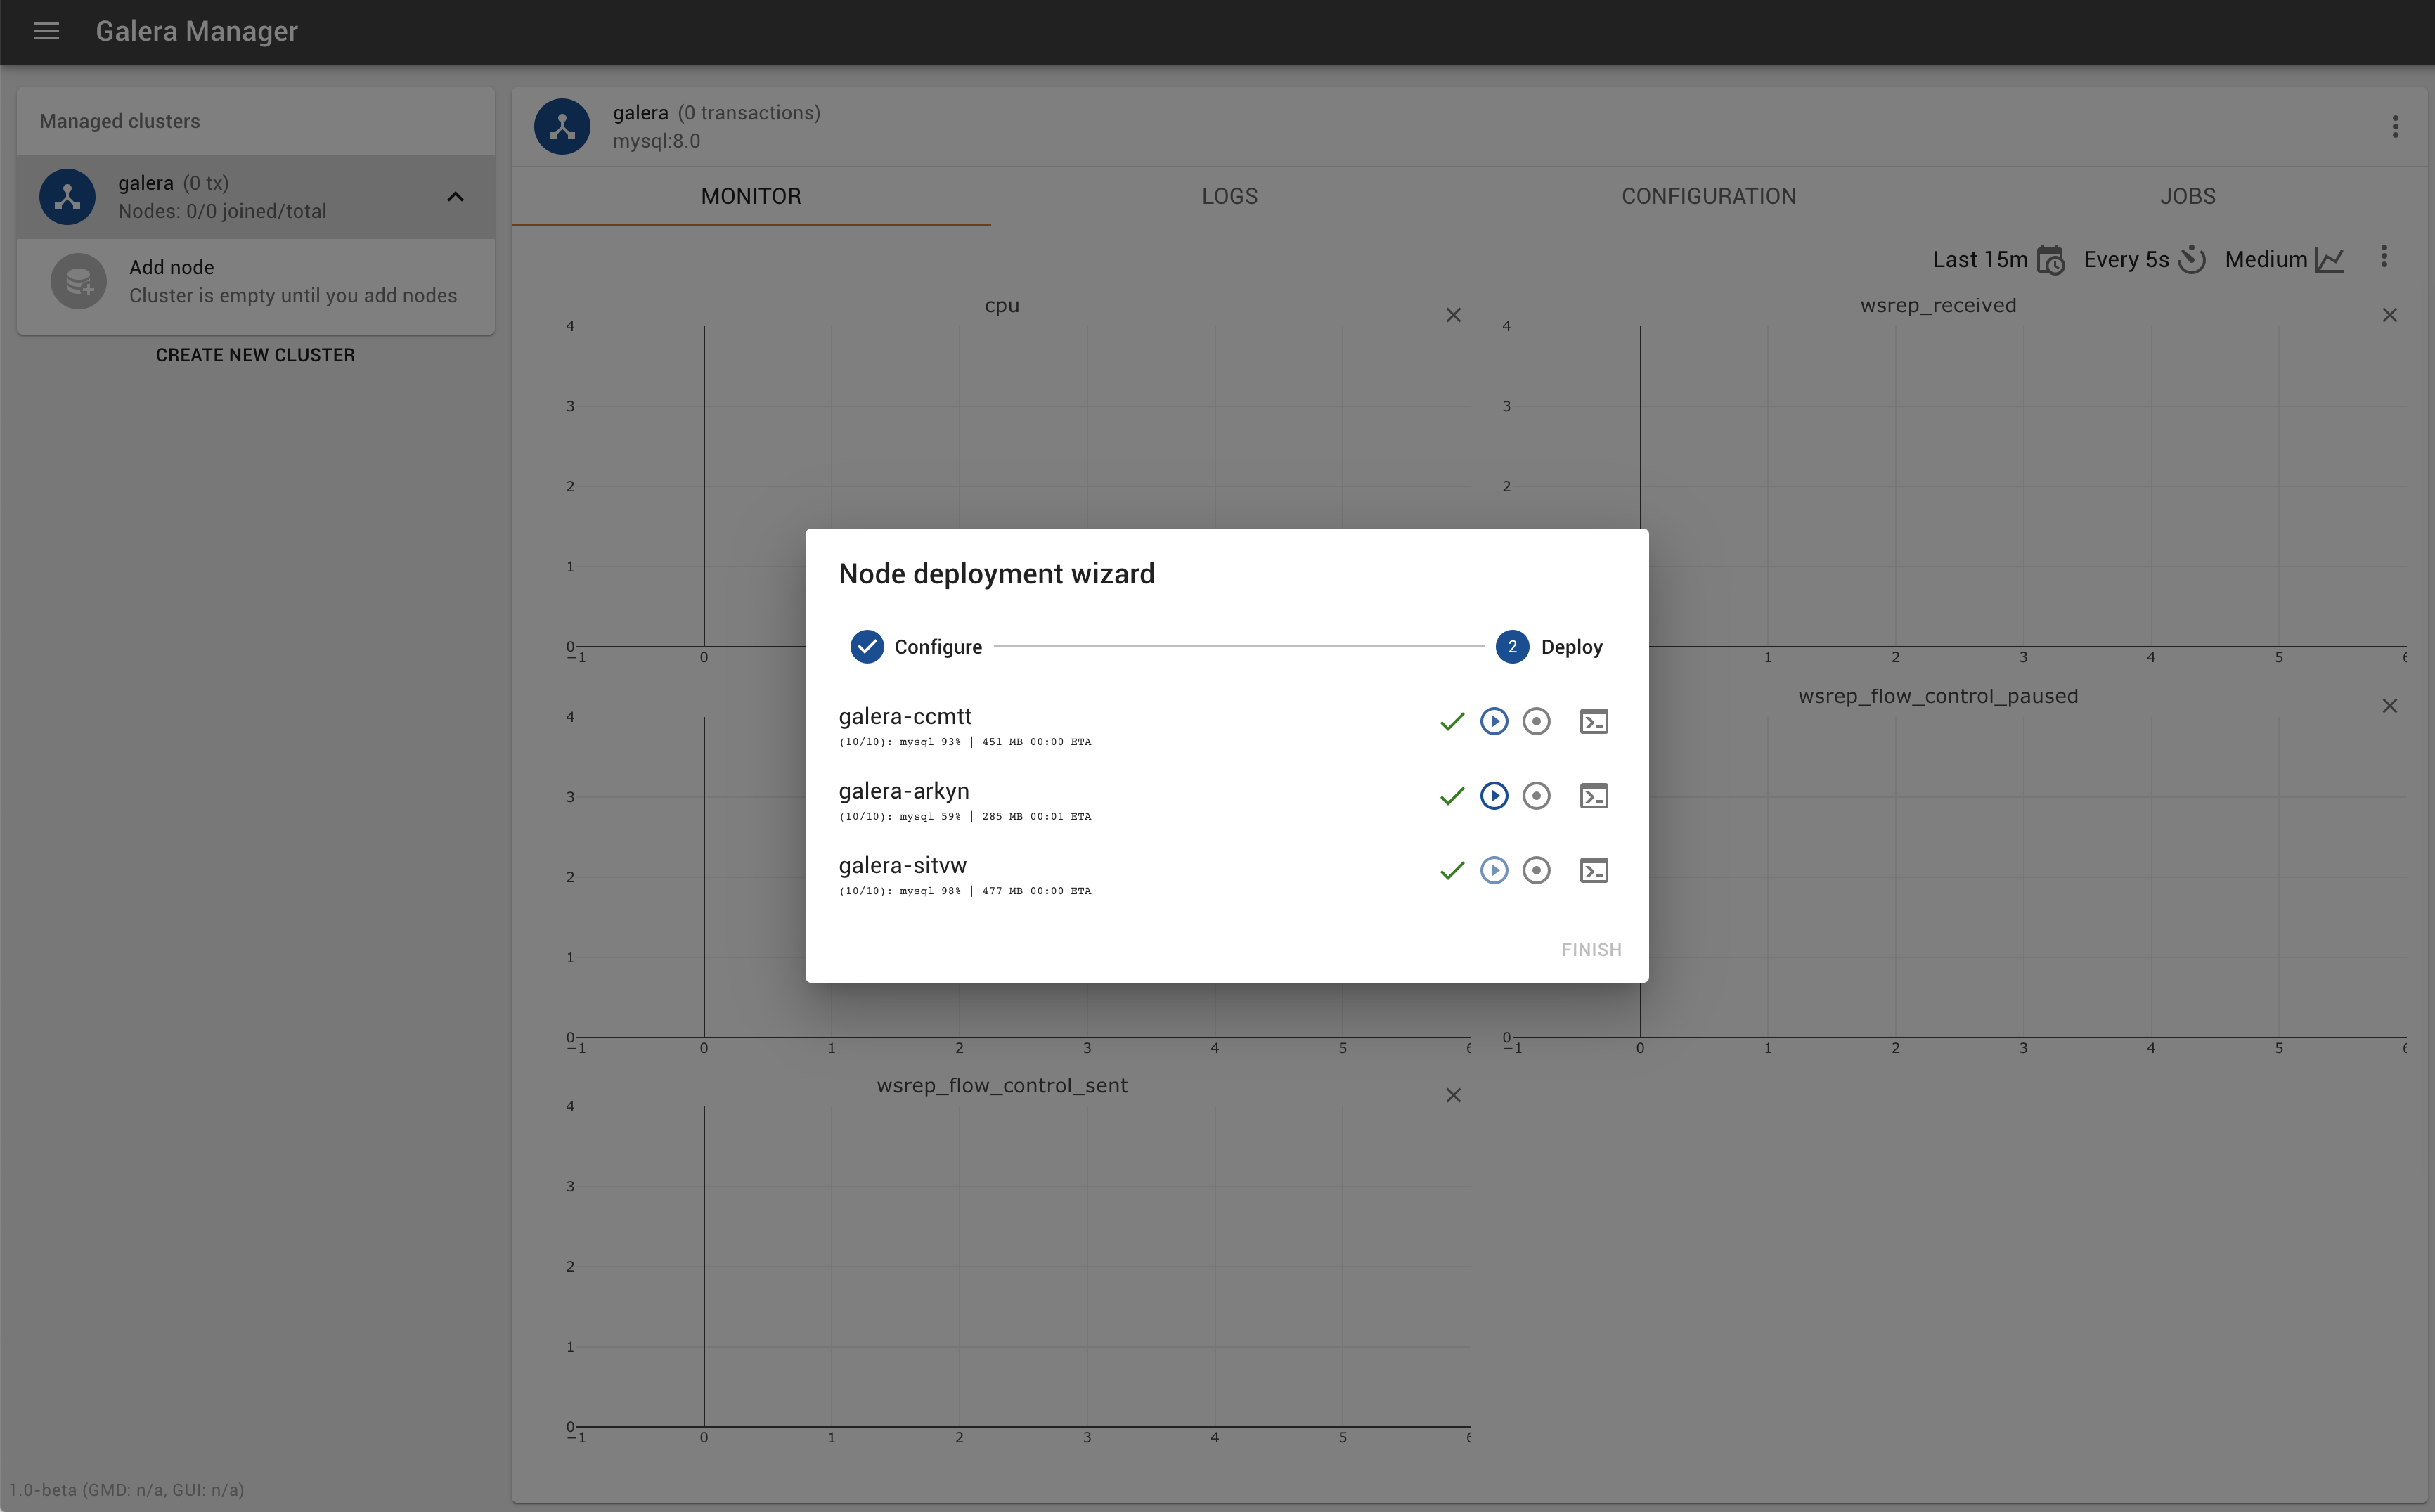
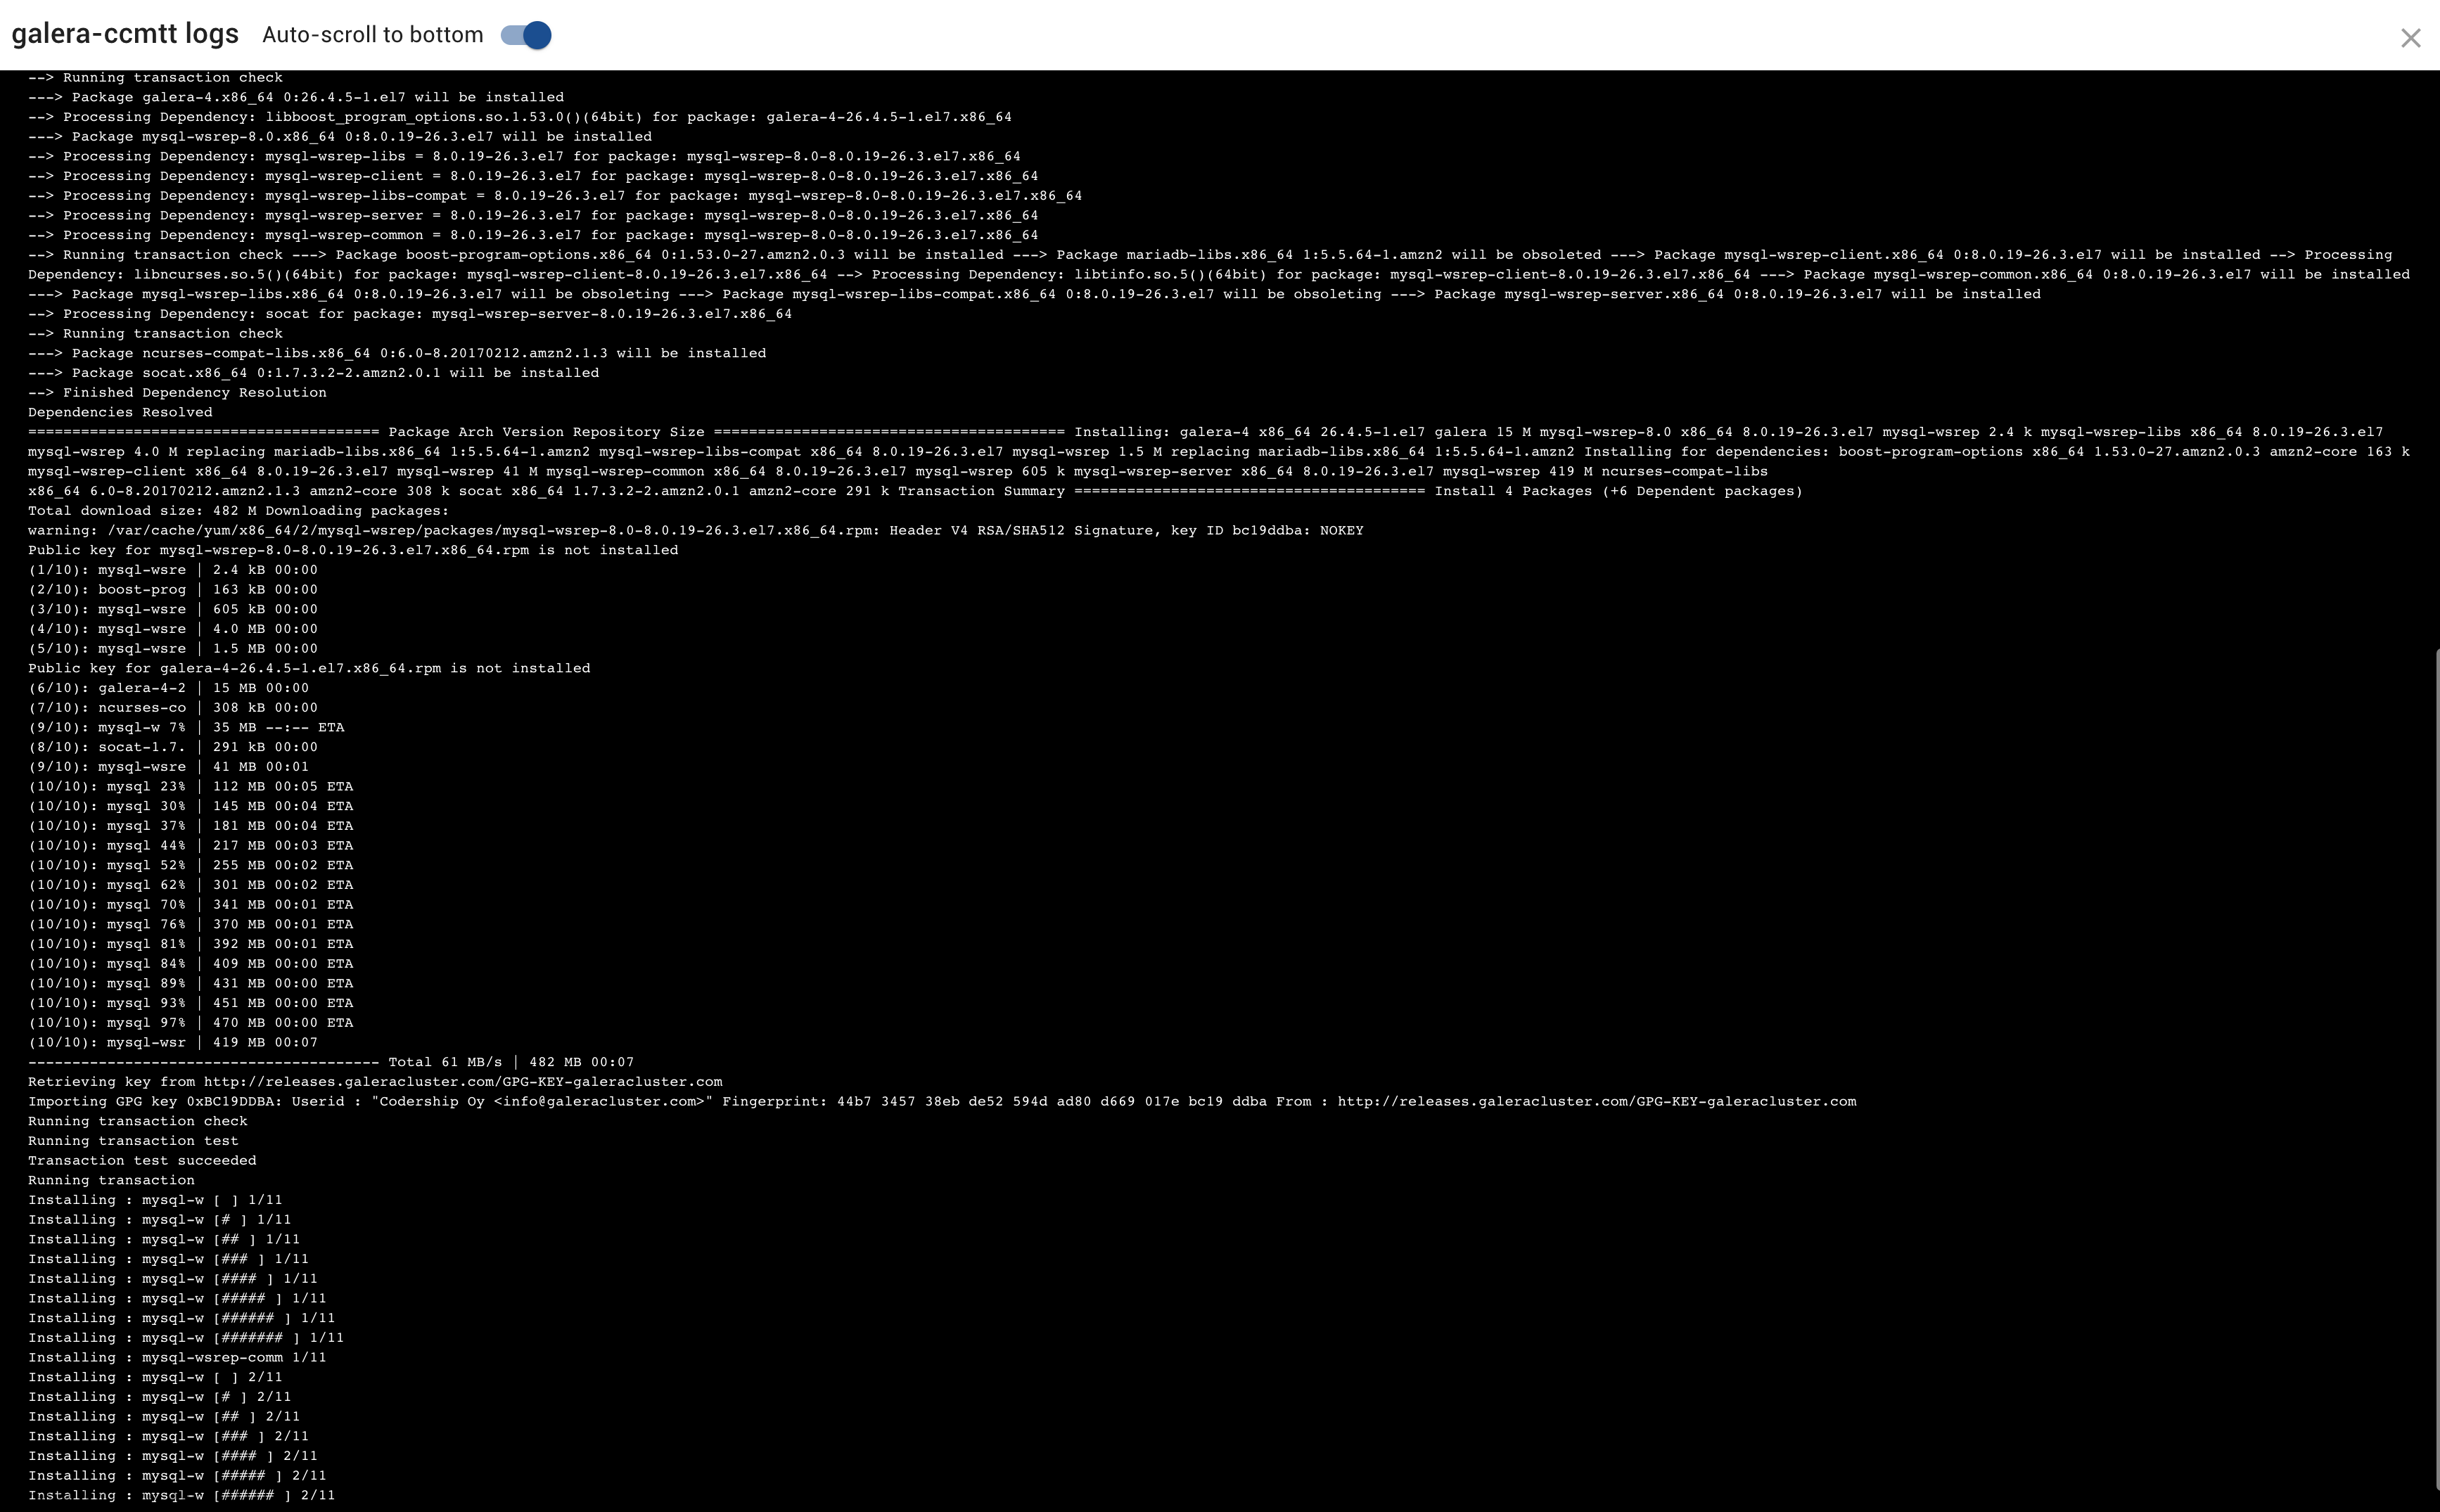
Once you click Deploy, you’ll notice that the install starts. You can switch tabs at this point while the deployment phase happens. This can take anywhere between 5-20 minutes. If you are wondering why the timing is so non-deterministic, it has a lot to do with all the packages that are being installed and latency between your instances and the repositories. The installer also wants to ensure that there are no failures, so on a slower instance (sometimes you have a noisy neighbour), there will be a lot more “sleeps” built-into the software to ensure proper execution. The good news is that you will see individual ETAs for your instance deploys. You can also hop on over to see individual logs to see how instance installs are progressing.
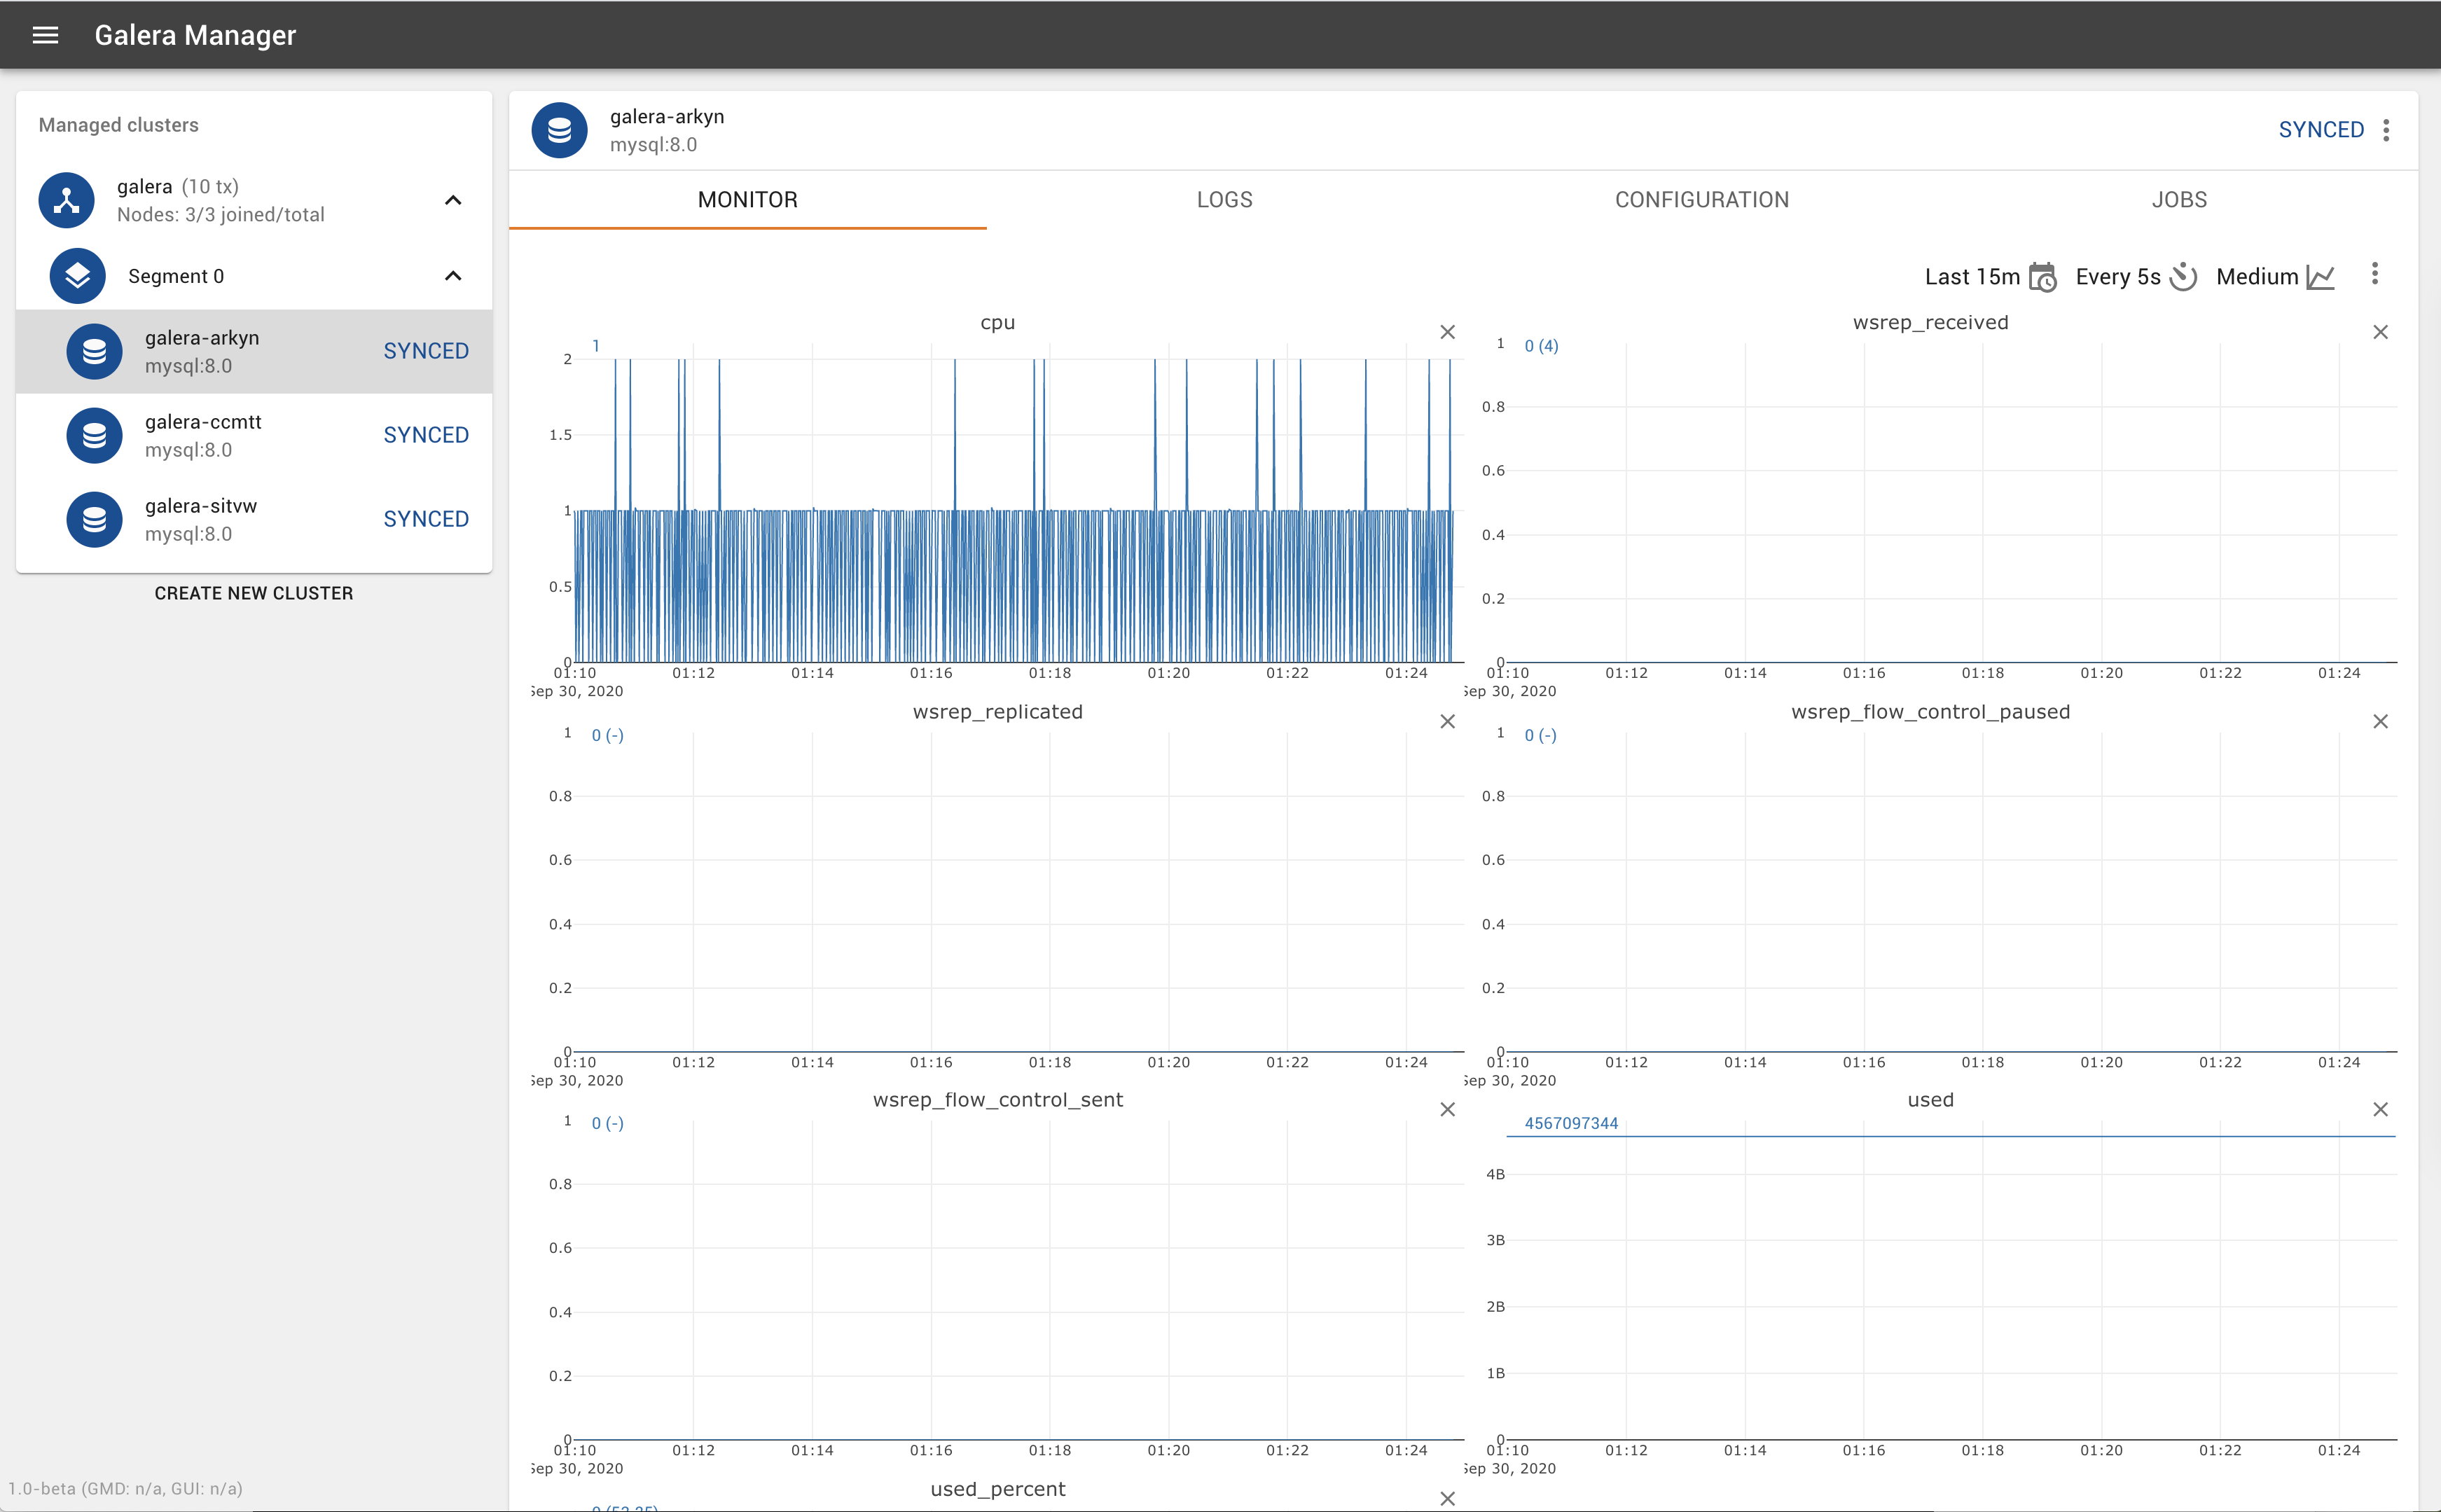
Once the deploy is completed, you will be presented with your new managed cluster. You will see tabs for monitoring, logs, configuration (which allows you to find out hostname information so you can use the mysql client to connect to or SSH into the server), as well as jobs that are running.
Congratulations, you now have a 3-node Galera Cluster deployed entirely using the GUI tool, Galera Manager. In future blog posts we will cover adding nodes, removing nodes, dropping into your cluster via SSH, and more.
We are looking for feedback on this beta, so please do email: info@codership.com. We are also constantly going to release updates to this release.
Being a beta, there are several known bugs naturally, some of which include debug logging turned on by default. Toggles will come to improve this as we make the next release. Being web-based software we plan to do a lot more releases and deploys constantly.